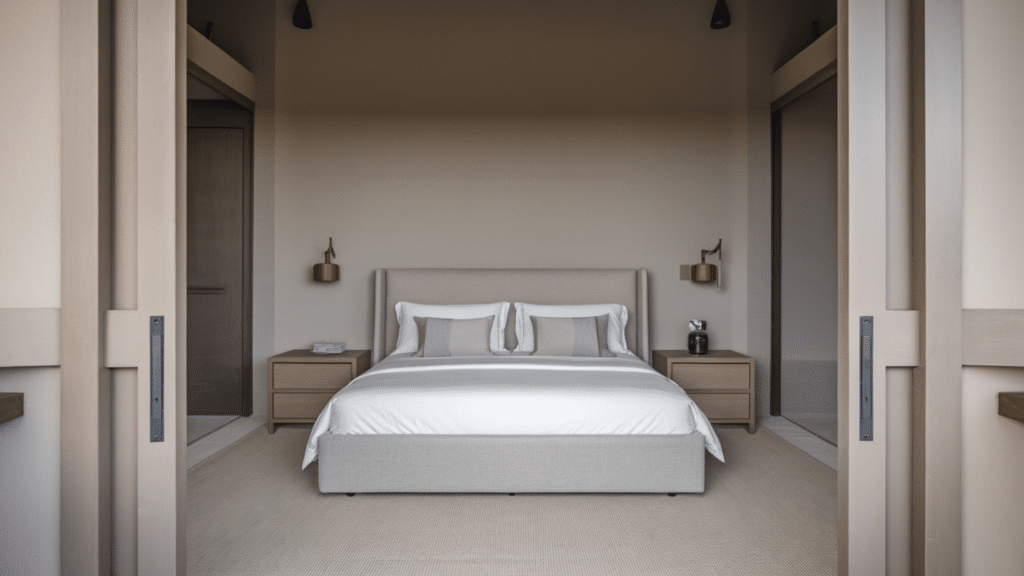


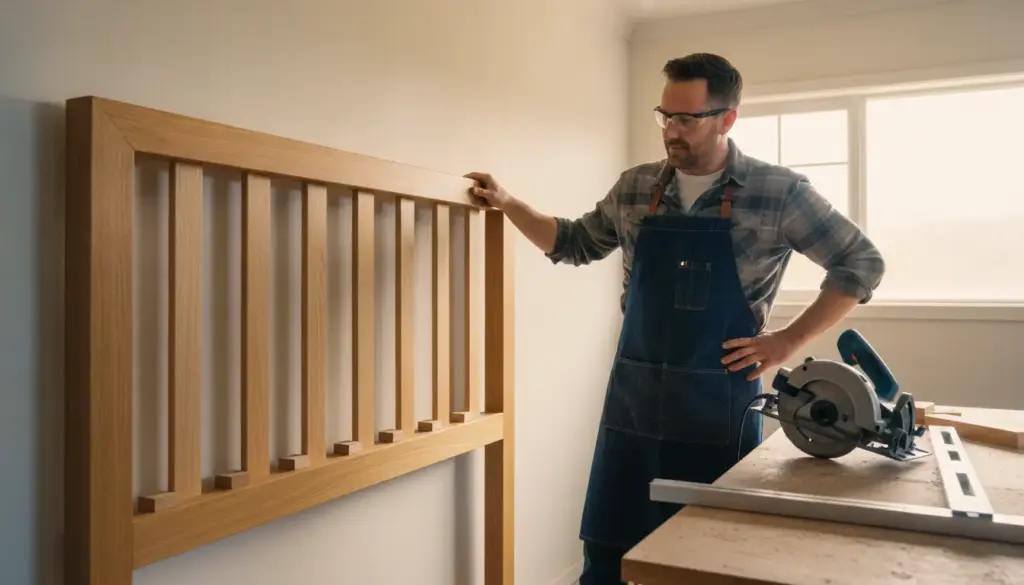
A custom headboard can change the whole feel of a bedroom. It can add warmth, color, texture, or a stronger focal point without replacing the bed itself.
It is also a realistic DIY project for someone who does not have a full woodworking shop.
The difficult part is rarely the basic design. It is getting all the pieces to line up.
A board that is slightly too long, a panel with an angled edge, or a row of slats with inconsistent spacing can make the finished headboard look uneven. Small errors become especially noticeable when the same shape or spacing repeats across a large piece of furniture.
The good news is that you do not need advanced woodworking skills to avoid those problems. Careful measurements, a simple cut list, stable materials, and controlled cuts can make a big difference.
Here is how to approach the project from start to finish.
Why Small Cutting Errors Stand Out on a Headboard
A headboard is usually made from simple shapes. That simplicity is part of what makes it approachable for DIY projects, but it also makes errors easier to see.
Imagine a slatted wooden headboard. If one slat is slightly shorter than the others, your eye may find it immediately. The same applies to uneven gaps or a top rail that is not quite horizontal.
Framed designs have a similar issue. A small error at one end can leave a visible gap where two pieces meet. Trying to force those pieces together during assembly can pull the entire frame out of square.
Accuracy becomes even more important when the design uses repetition. Matching slats, rails, trim pieces, or panels need to look like they belong together.
This does not mean every cut needs cabinetmaker-level precision. It means you need a consistent process.
Measure from the same reference points. Mark clearly. Make controlled cuts. Check pieces as you work rather than discovering all the differences during final assembly.
Pick a Headboard Style That Fits Your Skill Level
Before buying timber or making a cut list, decide what kind of headboard you want to build.
For a first project, simpler is usually better.
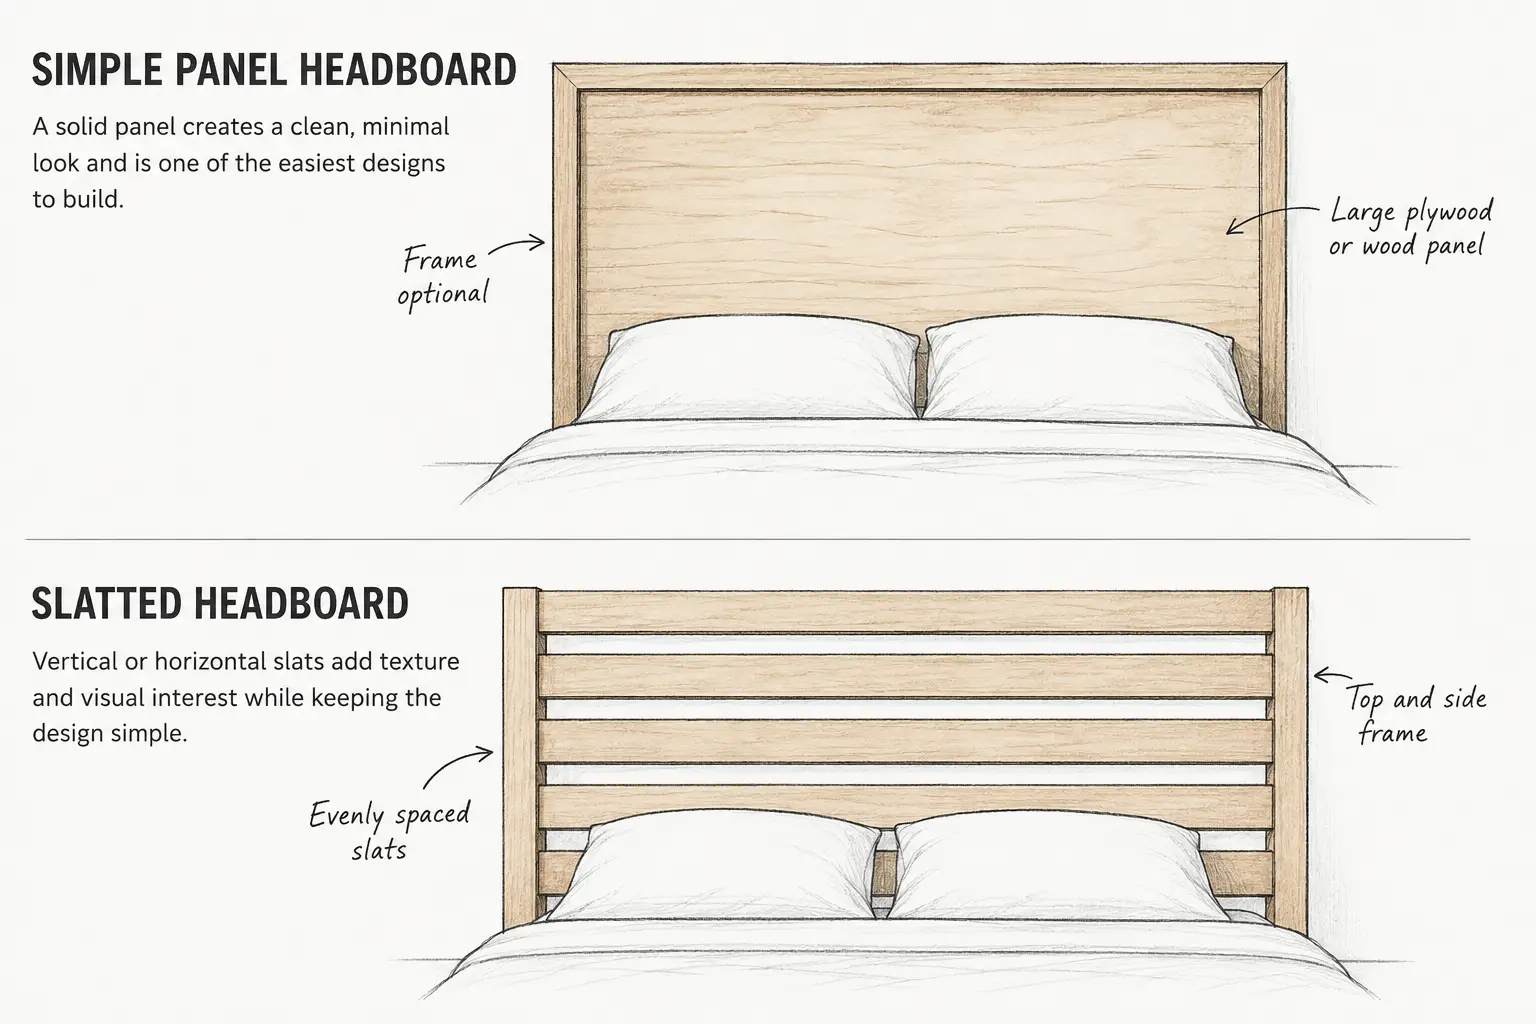
Simple Panel Headboards
A panel headboard can be one of the most forgiving designs. A large piece of plywood or another sheet material forms the main surface. You can add timber around the edges to create a frame or leave the panel simple for a cleaner look.
Because there are fewer individual pieces, there are fewer opportunities for measurements to drift.
Panel designs also offer plenty of options for the final appearance. They can be painted to match the wall, stained for a natural timber look, or incorporated into a more decorative design.
Slatted and Framed Headboards
A slatted headboard takes more planning but creates a distinctive look.
The main challenge is repetition. If the design has several vertical or horizontal slats, their dimensions and spacing should remain consistent.
A framed headboard creates another challenge: square corners.
If one side of the frame is longer than the other, or the ends are not cut consistently, the problem can affect every other piece during assembly.
Neither design is beyond a beginner. They simply reward careful preparation.
Choose a style based on the tools and time you have rather than picking the most complicated design you can find.
Measure the Bed and Wall Before You Start
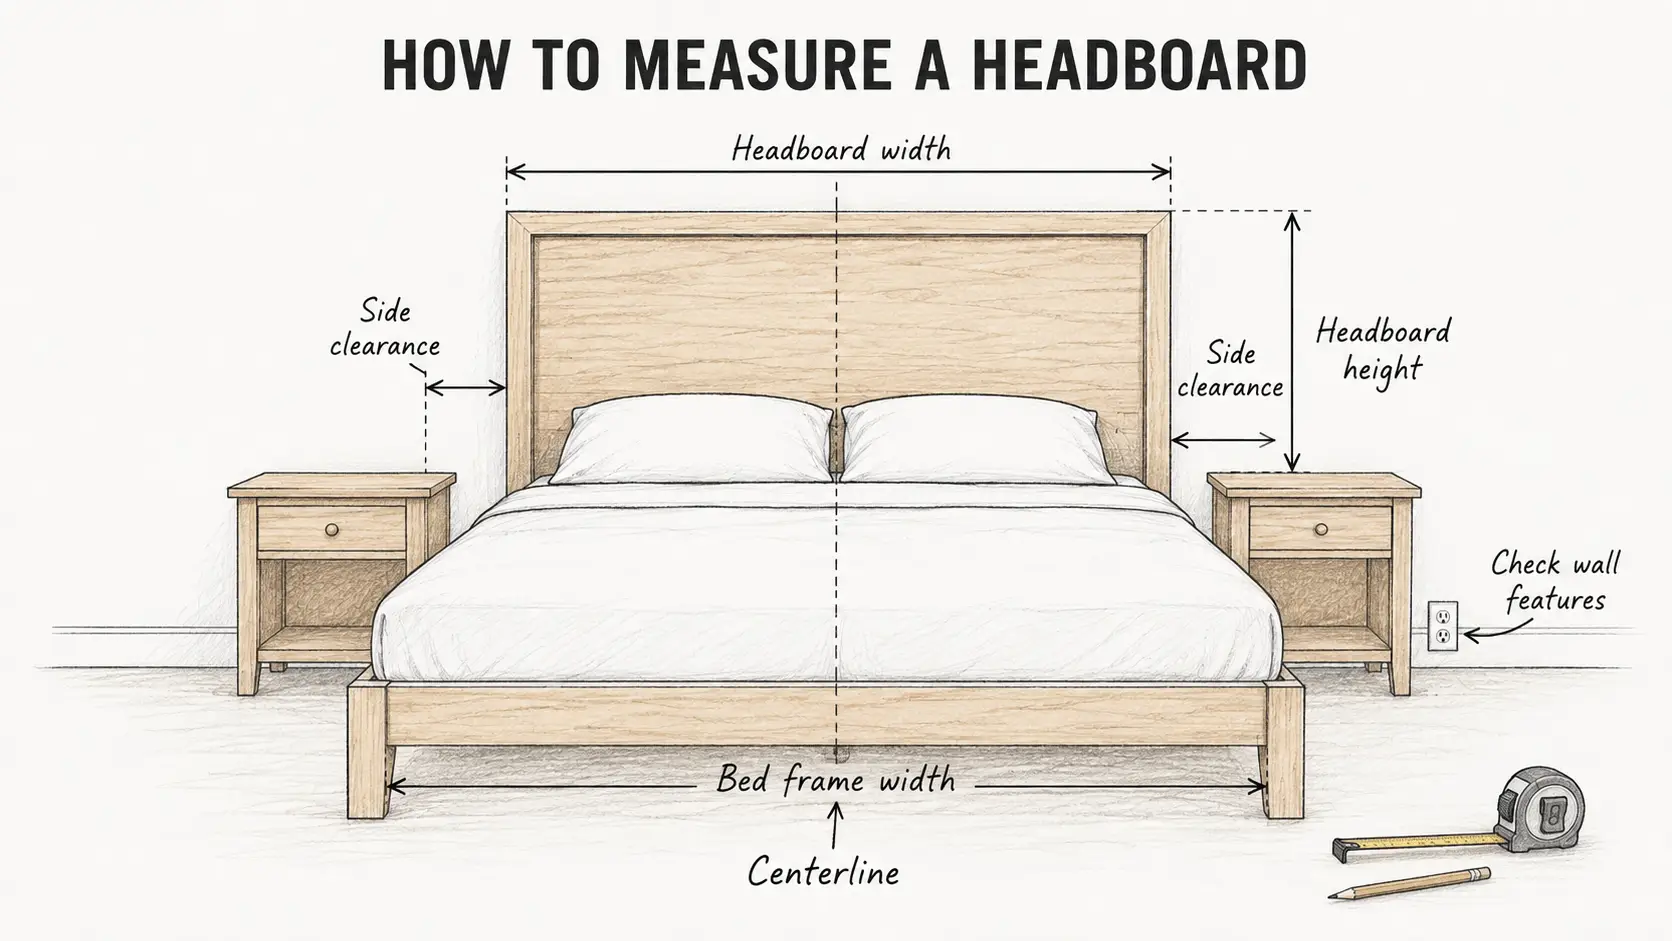
Do not assume the mattress dimensions tell you everything you need to know.
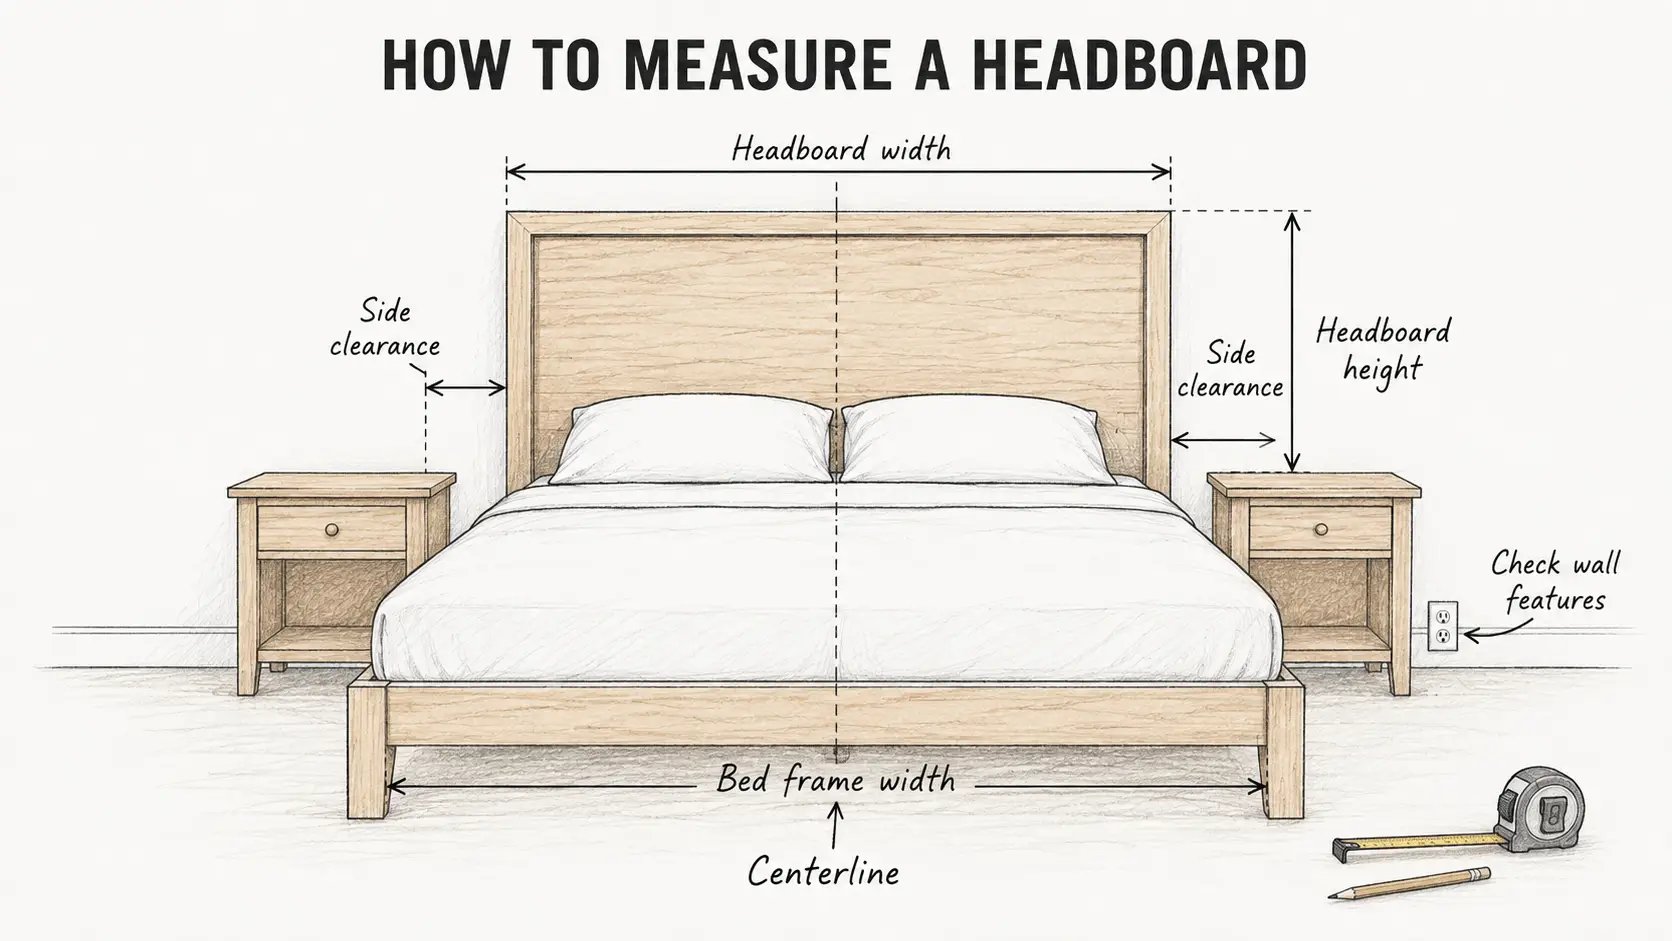
Measure the actual bed setup.
Start with the width of the bed frame. Then measure the available wall space behind it. Look at nearby bedside tables, power outlets, windows, switches, skirting boards, and other features that might affect the finished headboard.
Next, decide how wide you want the headboard to appear in relation to the bed.
Some designs stay close to the width of the mattress or frame. Others extend farther to create a larger visual feature. There is no single correct proportion for every bedroom.
Height also depends on the room and design. Think about pillows, artwork, windows, shelves, and anything else sharing the wall.
Once you have settled on the overall dimensions, mark a centerline. This gives you a reliable reference point when checking how the finished piece will sit behind the bed.
Write the measurements down. Do not rely on memory once you start cutting.
Build a Cut List Before You Touch the Saw
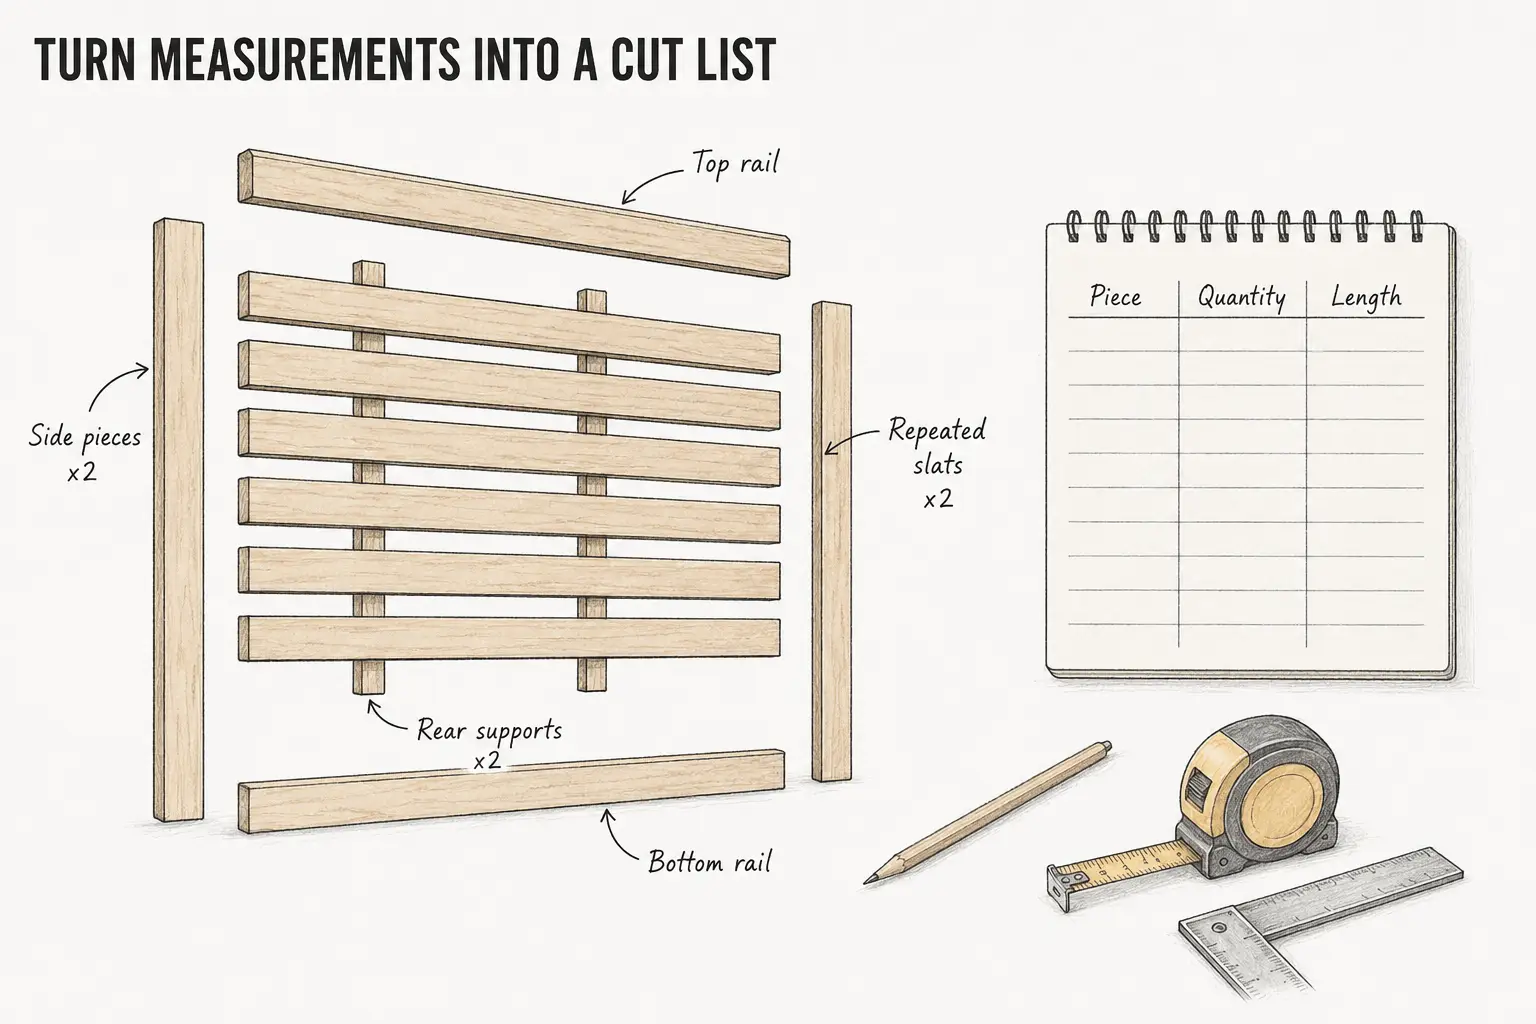
A cut list turns a sketch into a practical building plan.
Instead of measuring, cutting, and then deciding what comes next, list every piece the project requires before starting.
For a simple framed or slatted headboard, the list might include:
- Two side pieces
- A top rail
- A bottom rail
- Slats or internal panels
- Rear supports
- Trim pieces, if the design uses them
Write the required quantity next to each piece.
This is particularly useful for repeated components. If you need several identical slats, you can plan to make them using the same setup rather than measuring each one independently.
A cut list also gives you an opportunity to catch problems on paper.
Check that the dimensions of the internal pieces make sense once the thickness of the outer frame is considered. Confirm the number of slats and planned spacing. Make sure you have accounted for how pieces will overlap or join.
Then check the list again before cutting.
A few minutes spent here can save a lot of correction later.
Choose Flat, Stable Material
Even an accurate cut cannot completely compensate for badly warped material.
When selecting timber, look along the length of each board. Check for obvious bows, twists, or cups. Slight natural variation is normal, but heavily distorted pieces can make a simple project unnecessarily difficult.
Sheet materials such as plywood can work well for large panel designs because they provide a broad, consistent surface.
Solid timber is useful for frames, rails, and slats, especially when the natural grain will be part of the finished look.
MDF can also create a smooth painted surface for some indoor projects, although its characteristics and handling differ from solid wood and plywood.
Your choice should depend on the design, desired finish, and how the headboard will be assembled and mounted.
Whatever you choose, inspect the material before building your entire plan around it.
It is much easier to reject a badly warped board at the beginning than to work around it during assembly.
How to Make Straight Cuts for a Custom Headboard
Cutting is where a careful plan becomes a real piece of furniture.
It is also where small inconsistencies can multiply.
The goal is not to work quickly. It is to create a repeatable process.
Start by marking the cut clearly. Use a square when the cut needs to be perpendicular to the edge. Before starting the saw, check which side of the line needs to remain as the finished piece.
You also need to account for the material removed by the saw blade. Cutting directly through the wrong side of your mark can leave a piece shorter than intended.
Whenever possible, establish one reliable reference edge and use it consistently.
Support the Material Properly
The workpiece should be stable throughout the cut.
If a long board or sheet is poorly supported, it can move as you work. The offcut can also drop before the cut is complete, which may affect the final edge.
Set up your work area before starting. Make sure the material is supported appropriately and that the planned path of the saw is clear.
You should be able to concentrate on following the cut rather than trying to hold the workpiece in position at the same time.
Use a Guide for Long and Repeated Cuts
Keeping a handheld circular saw perfectly straight across a long cut can be difficult, especially for someone who does not use one regularly.
A guide gives the saw a consistent path to follow.
A basic straightedge can work for many projects when it is positioned and secured correctly. Another approach is a track-style or saw-guiding setup. For example, the best systems such as TrueTrac’s universal saw guides are designed around using a circular saw with a guided cutting setup. For a project like a headboard, the useful idea is not adding more equipment for its own sake. It is creating a reliable reference for long panel cuts or repeated pieces where a wandering cut would be obvious later.
Whatever method you use, set the guide carefully before starting. Check the measurement at more than one point, secure the workpiece and guide, and confirm which side of the line you need to keep.
For repeated pieces, make one first.
Check its length and edge before using the same setup for the remaining pieces. If the first one is wrong, making five identical copies simply gives you five wrong pieces.
Dry-Fit and Square Everything Before Assembly
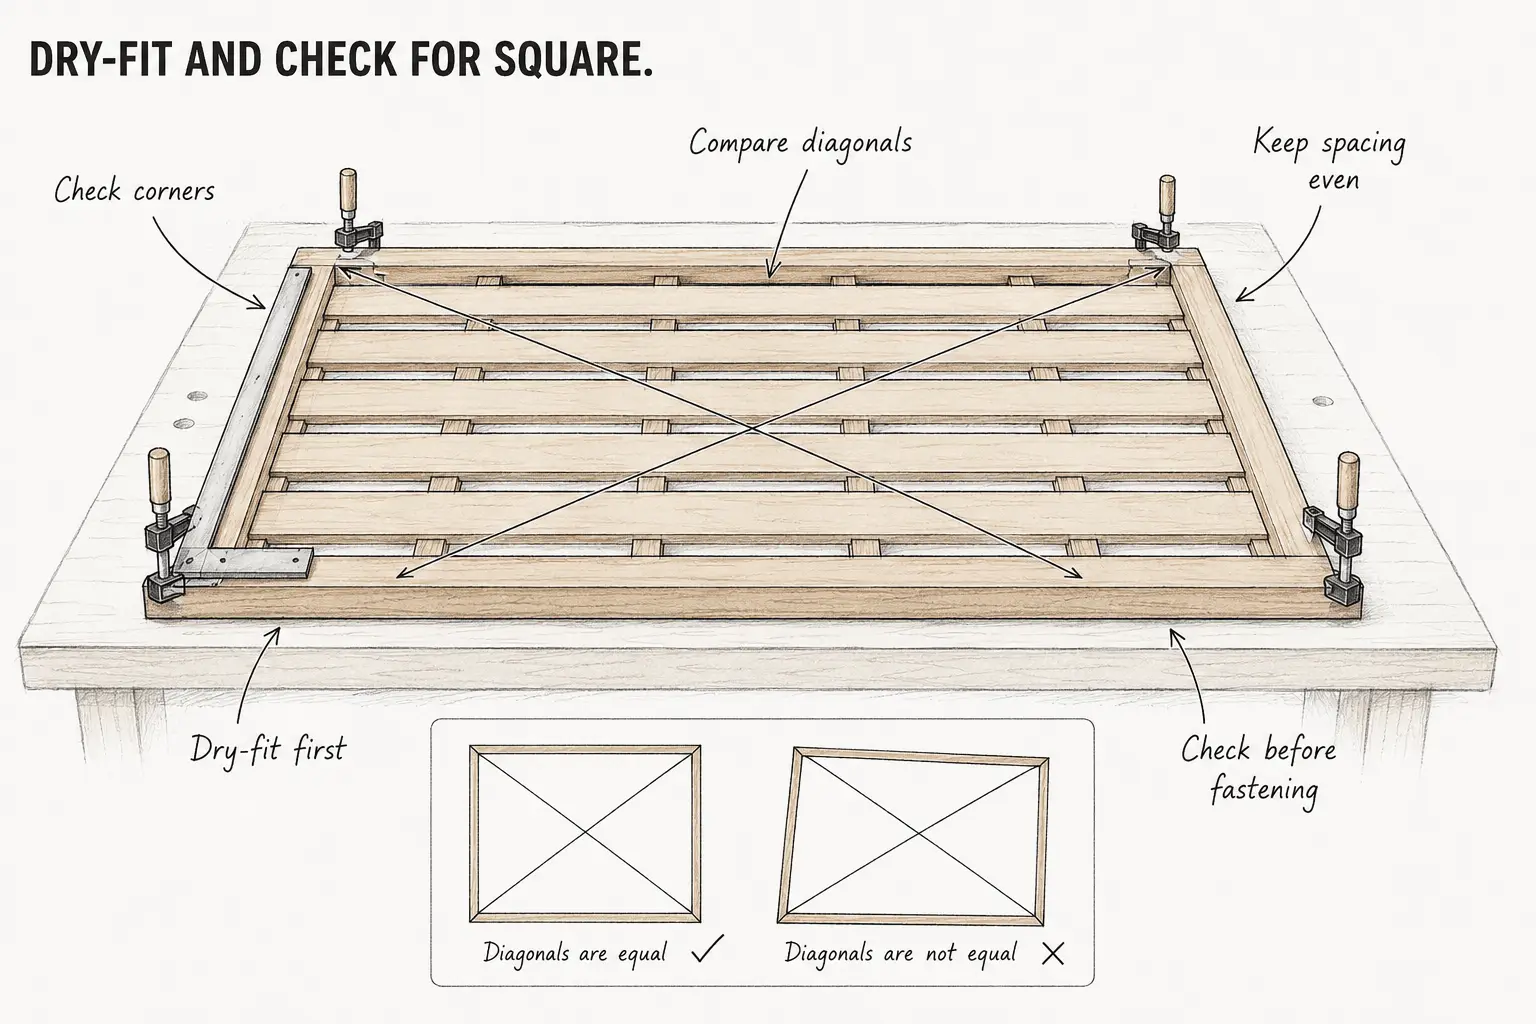
Once all the pieces are cut, resist the temptation to immediately reach for glue and screws.
Lay the headboard out first.
This is your chance to see the project as a whole while mistakes are still relatively easy to fix.
For a framed design, check the corners with a square. You can also compare diagonal measurements across a rectangular frame. If the diagonals differ significantly, the frame may not be square.
For a slatted headboard, look at the gaps between pieces.
Small spacing blocks can help maintain consistent gaps during layout and assembly. This is often more reliable than measuring every gap separately.
Stand back and look at the design as well.
Technical measurements matter, but so does appearance. Check whether the slats look evenly distributed and whether the design feels balanced around the centerline.
If a piece needs adjustment, deal with it now.
Trying to hide an alignment problem with extra clamping pressure during assembly usually creates a new problem somewhere else.
Assemble Without Losing Alignment
A perfect dry fit can still move during assembly.
Work methodically.
If your design uses glue, apply it according to the requirements of the adhesive and material. Position the pieces and use clamps where appropriate to hold them while fastening.
Do not assume more clamping pressure is always better.
Excessive pressure can shift pieces or pull a frame out of alignment. The goal is to hold the joint in its intended position.
Pilot holes may also be appropriate when using screws, depending on the material, fastener, and location. They can help reduce splitting and make screw placement more controlled.
For a larger frame, check for square during assembly rather than only at the end.
If you are attaching repeated slats, work from your established reference points and use consistent spacing. Avoid measuring each new gap from the previous slat because small differences can accumulate across the headboard.
Periodically step back and look at the entire piece.
It is much easier to correct a small shift before every fastener has been installed.
Sand, Finish, and Install the Headboard
Once assembly is complete, the project moves from construction to finishing.
Start by checking the edges and surfaces.
Sand rough cut edges and any areas that will be touched or easily seen. Work through appropriate sanding stages for the material and finish you have chosen rather than trying to remove every imperfection at once.
Remove dust before applying paint, stain, or another finish.
If possible, finishing the headboard before installation can make the process easier. You can reach the edges and corners without working against the wall.
Allow the chosen finish to dry or cure according to its instructions before moving on.
Installation depends on the design.
Some headboards attach directly to a compatible bed frame. Others are secured to the wall. Larger or heavier designs need mounting hardware appropriate for their weight, construction, and wall type.
Do not guess when it comes to structural mounting. Use suitable hardware and follow its installation requirements.
Once installed, check that the headboard is stable before putting the bed back into position.
Common Mistakes That Lead to Wonky Results
Most uneven DIY headboards are not ruined by one dramatic mistake. Problems often come from several small inconsistencies.
Measuring every repeated piece separately: Small differences in marking can produce pieces that should match but do not. Use a consistent reference or setup where possible.
Ignoring the saw blade’s cutting width: A cut removes material. Make sure you know which side of your mark is the finished piece.
Starting with warped material: Twisted boards make square assembly much harder, even when their lengths are correct.
Rushing long cuts: A wandering cut can leave a visible edge or create problems when two pieces need to meet.
Skipping the dry fit: Finding an error before glue and fasteners are added gives you far more options for correcting it.
Forcing joints together: If pieces do not fit naturally, find the cause. Heavy clamping can hide one gap while pulling the rest of the headboard out of square.
Letting measurements accumulate: Whenever possible, measure repeated positions from one fixed reference rather than from the previous piece.
A Better Headboard Comes Down to Preparation
A custom headboard does not require a professional workshop.
For many simple designs, the bigger difference comes from how you approach the project.
Choose a design that matches your experience. Measure the actual bed and bedroom. Turn those measurements into a cut list before starting. Select reasonably straight material and create a controlled setup for making your cuts.
Then check everything before committing to assembly.
Those habits may make the project feel slower at the beginning, but they can make the later stages much easier.
And when the finished headboard is sitting behind the bed, straight edges, even spacing, and square corners are the details that make a DIY project look like it was always meant to be there.