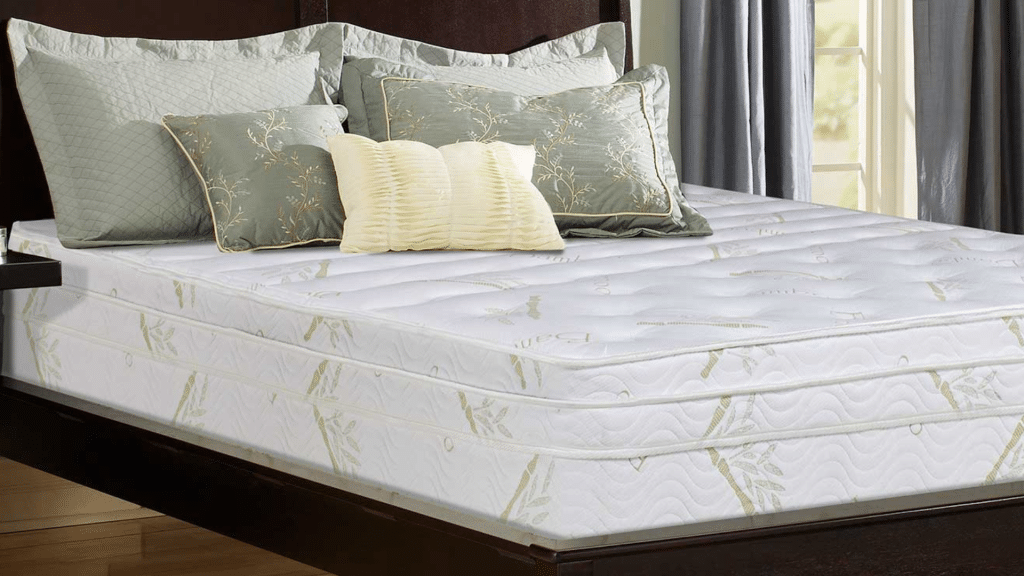



Why do fitted sheets always end up as bulky, uneven bundles in your linen closet? Their elastic edges pull the fabric inward, making the corners hard to match and the final fold difficult to control.
The solution is a simple corner-nesting method that turns the sheet into a flat rectangle before the last folds are made.
This blog explains how to fold fitted sheets step by step, store them neatly, adjust the method for different sizes, and avoid common mistakes.
Follow each step with your next clean sheet, then keep reading to make your bedding shelves easier to manage today.
What is the Easiest Way to Fold a Fitted Sheet?
The easiest way to fold a fitted sheet is to place each elastic corner inside another corner.
This joins the curved edges, giving the sheet a straighter shape. Once all four corners are nested, lay the sheet on a bed, table, or clean counter.
Smooth the fabric, fold the edges inward, and finish by folding the long rectangle into thirds. A flat surface helps control loose fabric and keeps the final bundle even.
Pro Tip: Nest all four corners, flatten the sheet into a rectangle, then fold it into thirds for neat storage in a drawer or linen closet.
What You Need Before Folding a Fitted Sheet
Gather a dry sheet, a clear surface, and simple storage tools before starting the folding process.
- A Clean, Dry Fitted Sheet: Damp fabric may develop a stale smell and deep creases during storage.
- A Flat Surface: Use a bed, table, counter, or clean floor to spread the sheet.
- Enough Working Space: Extra room makes it much easier to match corners and smooth each layer.
- Prompt Folding: Fold the sheet soon after drying, while the fabric is easier to shape.
- Optional Storage Supplies: Keep a matching pillowcase, basket, divider, or shelf label nearby.
- An Organized Storage Plan: These supplies keep bedding sets together and help you quickly find the correct size.
How to Fold Fitted Sheets Step-by-Step
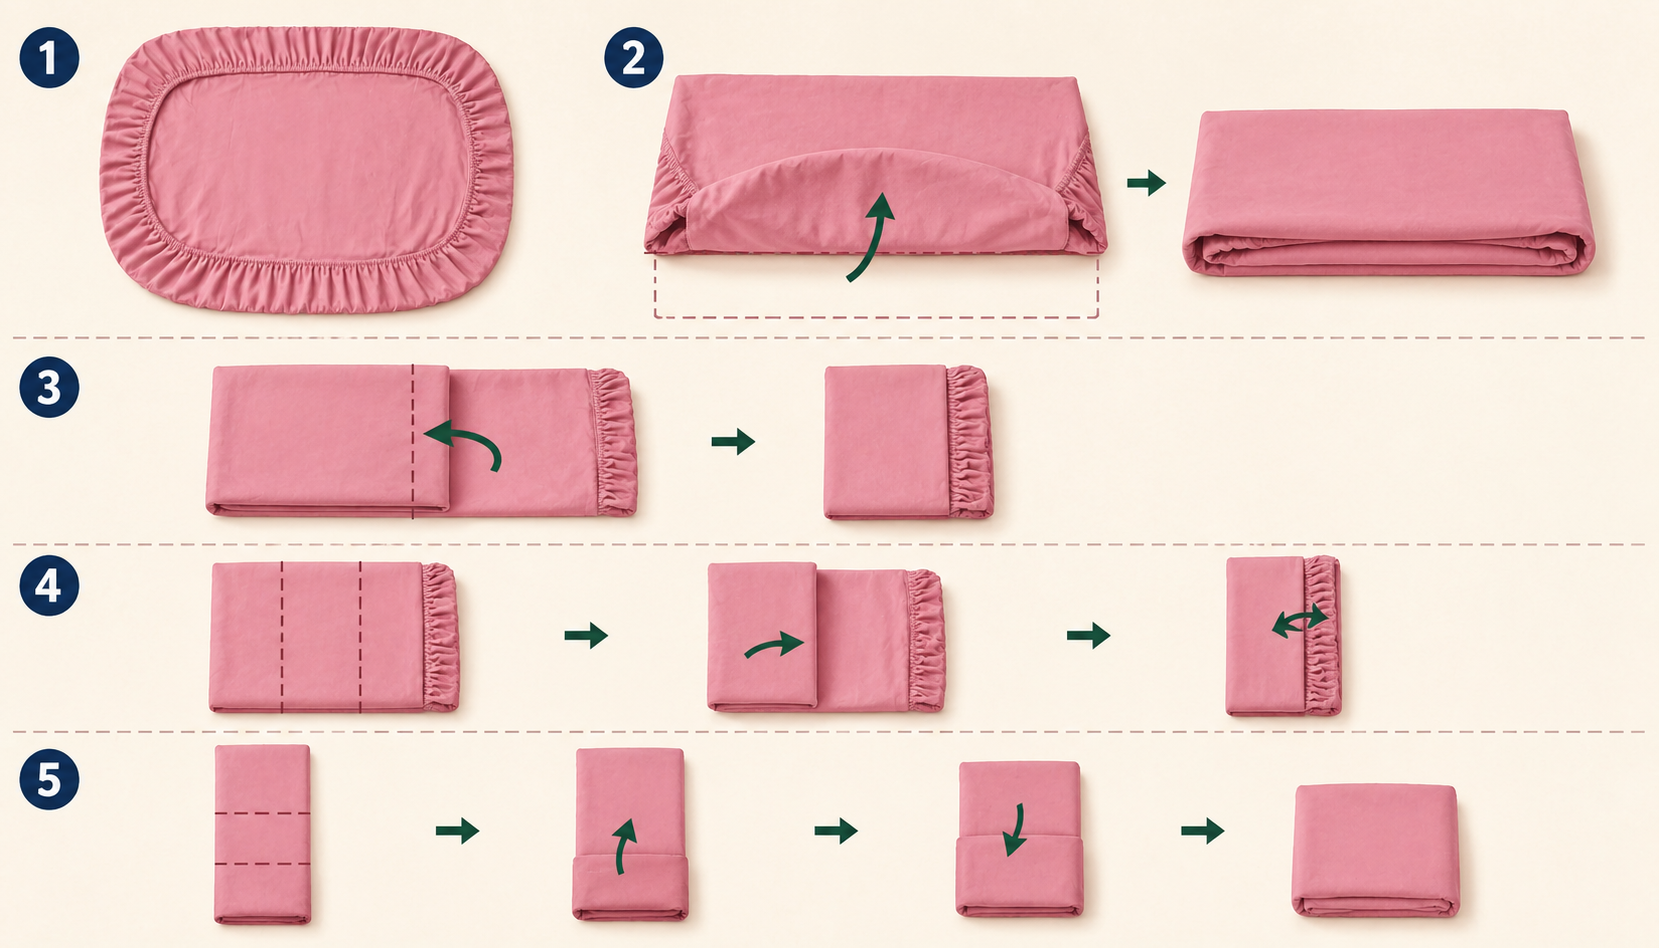
Folding a fitted sheet becomes much easier when you match the corners, control the elastic, and create a flat rectangle before making neat final folds.
Step 1: Lay the Sheet Flat
Lay the fitted sheet on a clean, flat surface with the elastic side facing upward. Spread the fabric so the full shape, rounded corners, and elastic edges are visible.
Smooth out large wrinkles with your hands, but do not stretch the elastic. Keeping the sheet flat from the start makes each fold easier to control.
Check that no corner is tucked underneath, since hidden fabric can create uneven layers and make the final bundle bulky.
Step 2: Fold the Bottom Half Upward
Take the lower half of the fitted sheet and fold it upward toward the top edge. Bring the bottom corners close to the upper corners and line up the side edges as evenly as possible.
The elastic sections may curve inward, which is normal. Smooth the folded layer with your hands to remove trapped air and creases.
After this fold, the sheet should look like a wide rectangle with the curved elastic edges contained inside.
Step 3: Fold One Side Across
Fold the right side of the wide rectangle across toward the left side. Match the top and bottom edges before pressing the fold flat.
Keep the elastic border tucked inside so it does not create a thick ridge along the outside. Smooth the fabric from the center toward the edges to remove any bunching.
The sheet should now form a narrower rectangle, making the folds simpler and helping the final shape stay compact and even.
Step 4: Fold the Long Sides Inward
Bring both long sides inward toward the center of the narrow rectangle. Fold one side first, then fold the opposite side over it or beside it, depending on the width.
Keep the edges straight and the elastic sections hidden between the layers. Press along each fold with your hands to flatten the fabric.
At the end of this step, the sheet should resemble a slim vertical strip with tidy sides and an even thickness throughout.
Step 5: Complete the Final Fold
Fold the top end of the slim strip downward toward the center. Then lift the bottom end upward and place it over the first fold.
Adjust the overlap until the bundle feels firm and fits your storage space. Press gently across the top to release trapped air and flatten the layers.
The fitted sheet should form a compact rectangle with no loose corners or elastic showing, making it easier to stack neatly with other bedding.
How to Store Fitted Sheets Properly
Store fitted sheets only after they are clean and fully dry. Fold each sheet into a flat rectangle so it stacks neatly without taking up extra space.
Keep matching fitted sheets, flat sheets, and pillowcases together inside one pillowcase. Group bedding by mattress size and use labels, baskets, or shelf dividers to prevent mixed stacks.
Place everyday sets within easy reach and store guest or seasonal bedding on higher shelves. Choose a clean, dry cabinet, drawer, or storage box.
Avoid packing sheets too tightly because compressed fabric can crease and make the closet harder to organize.
Does the Method Change for Different Sheet Sizes?
Sheet size affects handling, but the same corner-nesting method works for every fitted sheet.
1. Twin and Full Fitted Sheets: Twin and full fitted sheets are easier to control because they contain less fabric. Pair the corners while standing, then place the sheet on a bed or table. Fold it into a narrow rectangle that fits the shelf.
2. Queen and King Fitted Sheets: Queen and king fitted sheets have more fabric, so they may twist or touch the floor. Use a bed or large table for support. Smooth one section at a time before making the final folds.
3. Deep-Pocket Fitted Sheets: Deep-pocket sheets include extra side fabric for thick mattresses or toppers. Nest the corners first, then flatten the deep panels toward the center. Remove trapped air before folding the sheet into a compact rectangle.
4. Crib and Toddler Fitted Sheets: Crib and toddler fitted sheets are smaller, but tight elastic can curl the corners inward. Push each corner outward before pairing them. Fold the finished rectangle in half or thirds and store it separately.
Common Fitted Sheet Folding Mistakes
Small folding errors can leave a fitted sheet bulky, uneven, and harder to store. Correct these problems before making the final fold:
- Mismatched Corners: Follow the seams and pair corners from the same side.
- Damp Fabric: Dry the sheet fully before folding or storing it.
- Trapped Air: Smooth each corner pocket and press the layers flat.
- No Flat Surface: Use a bed or table to shape clean edges.
- Stretched Elastic: Handle the corners gently without pulling them hard.
- Oversized Bundle: Match the final width to your shelf or basket.
- Rolled Ball: Form a rectangle before completing the last folds properly.
Final Takeaway
Folding fitted sheets becomes easier once the corners are matched and tucked into one another.
A flat rectangle saves shelf space, keeps bedding stacks stable, and makes the correct set easier to find.
Store each clean, dry sheet with its matching pieces so laundry day feels less cluttered. With regular practice, the process soon takes only a few minutes.
Try the method after your next wash, then comment below with the folding trick that works best at your home today.
Frequently Asked Questions
Can Fitted Sheets Be Stored in Vacuum Bags?
Vacuum bags are suitable for long-term storage but may leave deep creases in the fabric. Use breathable containers for regularly used sheets.
Should Scented Sachets Be Placed with Stored Sheets?
Sachets can add a light scent, but they should not come into direct contact with the fabric. Place them inside a small pouch to prevent marks.
How Often Should Stored Fitted Sheets Be Checked?
Check stored sheets every few months for moisture, odors, dust, or pests. Refold the stacks when they become uneven or compressed.