
Replacing a lawn mower belt might sound like a complicated repair, but in reality, it’s a manageable task for most homeowners with a bit of guidance. Whether you’re dealing with a worn-out drive belt or a slipping deck belt, understanding how belts work – and how to measure and replace them correctly – can save you time and money.
This guide walks you through the process step by step while also answering common questions like how lawn mower belts are measured, how to determine the correct size, and what to look for when choosing a replacement.
Understanding Lawn Mower Belt Types and Functions
Before replacing a belt, it’s important to know what type you’re working with. Most lawn mowers use one or more of the following:
- Drive belts: Transfer power from the engine to the wheels
- Deck belts: Power the blades that cut grass
- Transmission belts: Found in more complex riding mowers
Each belt has a specific role, and using the wrong type can lead to poor performance or even damage your mower. That’s why identifying the exact belt needed for your model is crucial.
When sourcing replacement parts, many users turn to lawn mower belts from UDC Parts, since having access to clearly categorized and compatible options makes the process much easier, especially when you’re unsure about sizing or specifications.
How Are Lawn Mower Belts Measured?
One of the most common questions is: How are mower belts measured?
Lawn mower belts are typically measured by two main factors:
- Length (usually in inches)
- Width (also in inches, often fractions like 1/2″ or 5/8″)
The measurement usually refers to the outside circumference of the belt, although in some cases, manufacturers may list the inside measurement. This is why it’s important to verify how the measurement is defined when selecting a replacement.
Belts also have a specific profile or shape (such as V-belts), which must match your mower’s pulley system. Even a small difference in width or angle can affect performance.
How to Measure Lawn Mower Belts Correctly
If your old belt is still intact, measuring it is straightforward:
- Remove the belt from the mower
- Lay it flat on a surface without stretching it
- Measure the full length using a tape measure
- Measure the width across the belt
If the belt is broken, you can still estimate the correct size by routing a string along the belt path and measuring the string length.
This answers another common query: how is a lawn mower belt measured when the original is damaged? The string method is one of the most reliable approaches in that case.
What Size Belt Does My Mower Need?
Determining the correct belt size depends on several factors:
- Mower make and model
- Deck size (for riding mowers)
- Type of belt (drive vs. deck)
The easiest way to find the correct size is to check your mower’s manual or look up the part number associated with your model. If that’s not available, measuring the old belt or consulting a reliable parts database can help.
This is where platforms like UDC Parts become particularly useful. Instead of guessing, you can search by mower model and quickly find compatible belts that match the exact specifications required.
Step-by-Step Guide to Replacing a Lawn Mower Belt
Replacing a lawn mower belt is a practical DIY task. Here’s a general step-by-step guide:
1. Disconnect the Power
Always remove the spark plug or disconnect the battery (for riding mowers) to prevent accidental startup.
2. Access the Belt Area
Depending on your mower type, you may need to:
- Remove the mower deck
- Take off protective covers
- Raise the mower using a jack or lift
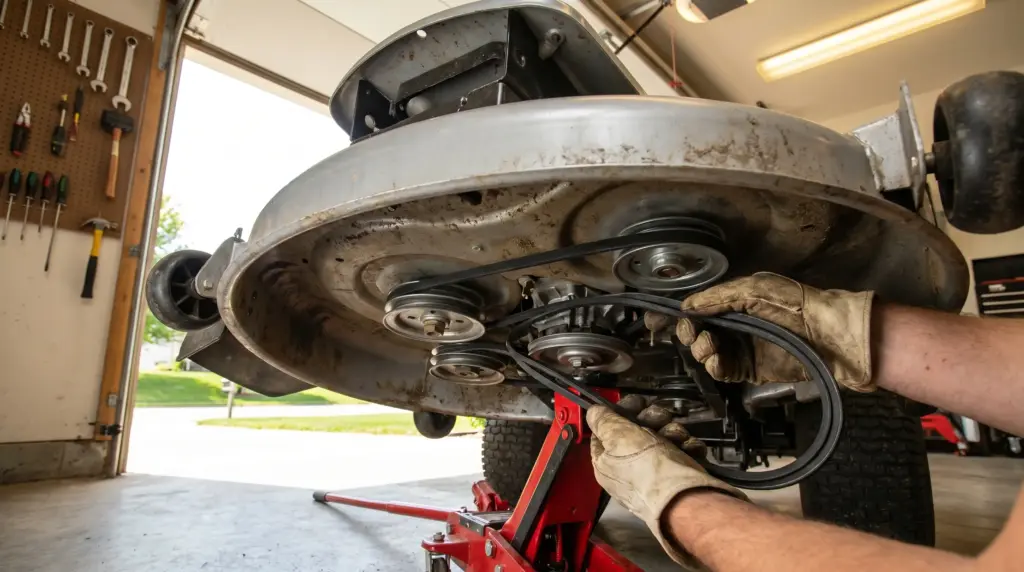
3. Remove the Old Belt
Carefully slide the belt off the pulleys. Take note of how it is routed – taking a photo beforehand can be very helpful.
4. Inspect Pulleys and Components
Check for:
- Worn or damaged pulleys
- Debris buildup
- Misalignment
Replacing a belt without addressing underlying issues may lead to premature wear.
5. Install the New Belt
Route the new belt along the same path as the old one. Make sure it sits properly in each pulley groove.
6. Reassemble and Test
Reattach any removed parts, reconnect power, and test the mower to ensure everything runs smoothly.
Common Mistakes to Avoid
Even though the process is straightforward, there are a few pitfalls to watch out for:
- Using the wrong belt size: Even slight differences can cause slipping or excessive wear
- Incorrect routing: Misaligned belts can damage pulleys or reduce efficiency
- Skipping inspection: Worn pulleys can ruin a new belt quickly
- Overlooking belt type: Not all belts are interchangeable, even if they appear similar
Avoiding these mistakes will help extend the life of your new belt and keep your mower running efficiently.
Signs Your Lawn Mower Belt Needs Replacement
Knowing when to replace your belt is just as important as knowing how. Look for these warning signs:
- Cracks or fraying
- Glazing or shiny spots
- Slipping or loss of power
- Squealing noises during operation
If you notice any of these, it’s time to replace the belt rather than risk a breakdown during use.
Why Accurate Measurement Matters
Accurate measurement isn’t just about fit – it directly affects performance. A belt that’s too loose may slip, while one that’s too tight can strain the engine and bearings.
That’s why understanding how to measure lawn mower belts correctly is essential. It ensures:
- Proper tension
- Efficient power transfer
- Longer lifespan of both the belt and mower components
Using trusted sources for replacement parts also reduces the chances of ordering incorrect sizes.
Final Thoughts
Replacing a lawn mower belt doesn’t have to be complicated. With the right tools, a bit of preparation, and a clear understanding of how belts are measured, you can handle the task yourself with confidence.
By learning how to measure lawn mower belts, identify the correct size, and install them properly, you not only save money but also keep your equipment running at peak performance. And when you need reliable parts, having access to well-organized resources can make the entire process smoother and more efficient.