

Rolling over at 2 a.m. and hearing that sharp creak from the bed frame is one of those things that starts as an annoyance and quickly becomes a sleep problem. Most people assume it is the mattress, but the noise usually comes from loose hardware, friction between parts, weak center support, or even the floor beneath the legs.
Knowing how to stop squeaky bed noise starts with identifying the actual source, not guessing and spraying everything with oil. The frame, slats, box spring, headboard, and floor can all produce similar sounds. Fixing the wrong one wastes time and lets the real cause keep going.
This article covers twelve practical DIY repairs in order, from the simplest hardware check to structural reinforcement, so the right fix is easy to match with the actual problem.
What a Squeaky Bed Frame Really Is and Why It Matters
A squeaky bed is a friction or movement problem. When two parts rub under body weight, the contact point generates sound. Metal can squeak at brackets, bolts, or side rail plates when they loosen over time.
Wood creates a lower creak when slats shift agaiånst ledges, when joints dry out, or when rail hooks move under pressure. A box spring or foundation can also develop internal noise when its wooden frame, coil supports, or corner joints loosen from use.
None of these are permanent sounds. They are mechanical problems, and most have a straightforward fix once the source is found.
A squeaky bed can interrupt sleep, but it can also signal something worth checking. Loose slats, a bending center rail, or unsupported corners are not just noise issues. They affect how evenly the mattress is supported, which in turn affects how well the body rests.
The Centers for Disease Control and Prevention lists a quiet, dark, and cool room as part of healthy sleep habits. A consistently noisy bed works against that environment every night.
Common Causes I Noticed
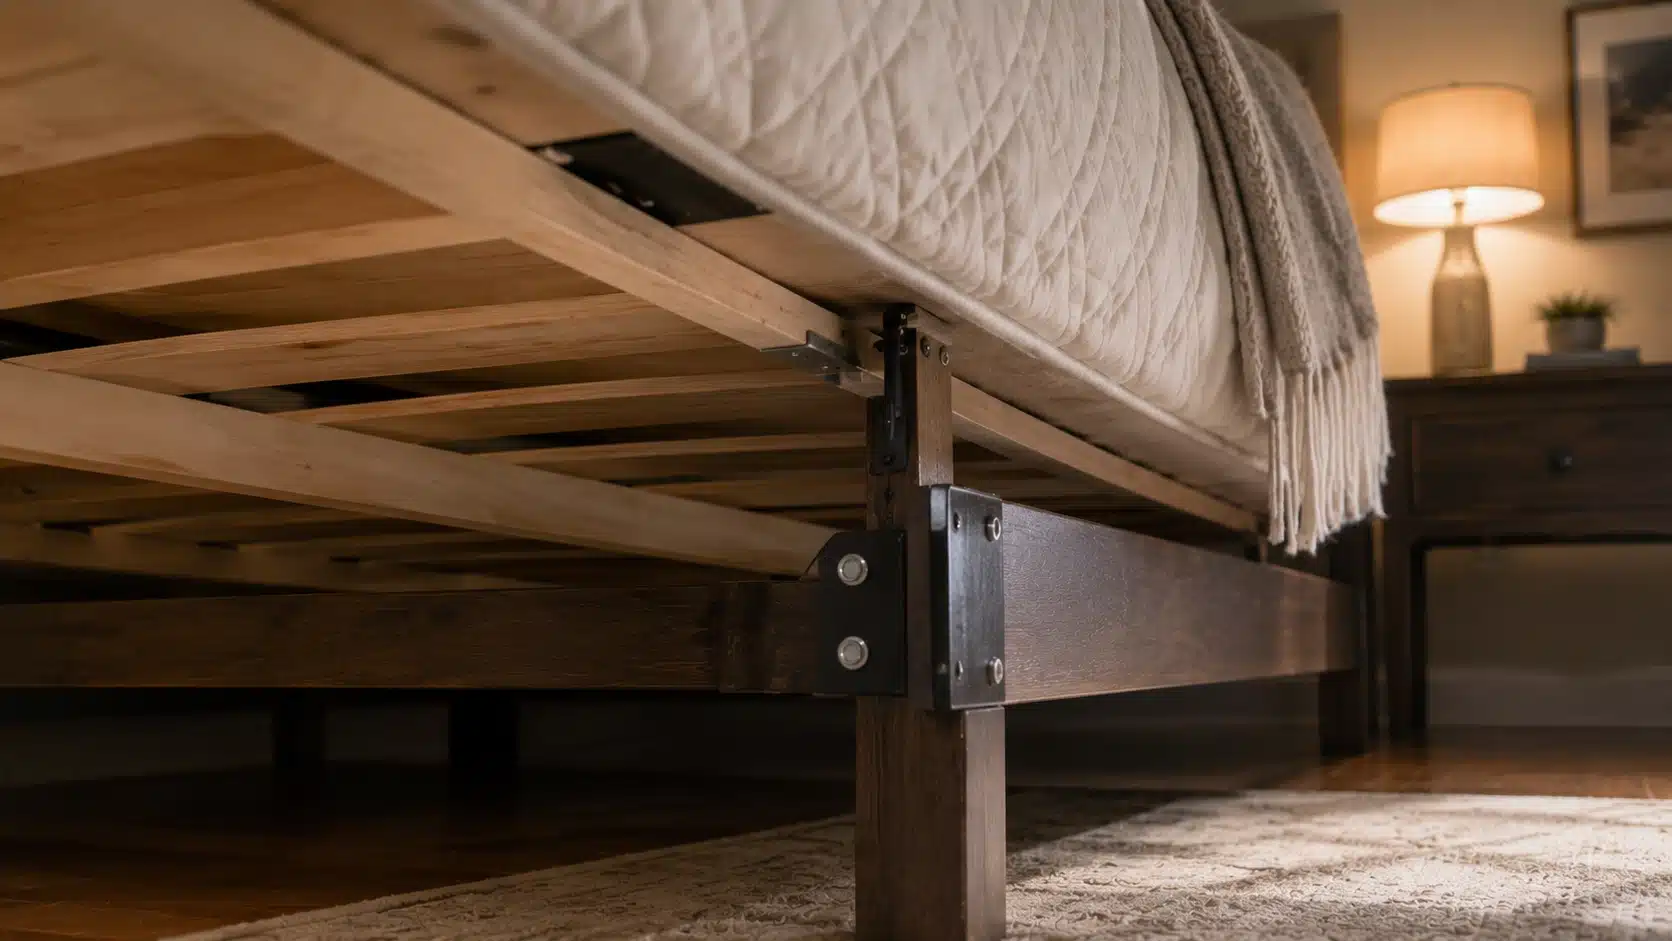
A squeaky bed usually comes from one part, even when the sound feels like it is coming from the whole setup. Many of these issues start at your bed’s foundation piece, so checking the frame, slats, headboard, center support, and floor before choosing a fix is the fastest way to isolate the noise.
- Loose bolts, screws, or brackets: Bed frames loosen over time from movement and body weight. Check corner brackets, side rails, center beam hardware, and headboard bolts first
- Slats rubbing against the frame: Wood slats can creak when they rub directly against the rail ledge. Metal slats can also scrape against bracket slots as weight shifts
- Headboard movement: A loose headboard can squeak at the bolt points or tap lightly against the wall, making the sound seem like a frame issue
- Weak center support: Queen and king beds need strong middle support. A floating center leg, bending rail, or flexing slats can create noise near the middle of the bed
- Floor contact: Bed legs can scrape hardwood, tile, uneven flooring, or a loose rug. This can sound like a frame squeak, but the fix is often simple
Once you know the cause, the repair becomes easier. Tighten loose hardware, cushion rubbing parts, support weak areas, or protect the floor based on the exact noise source.
How to Stop Squeaky Bed: Quiet DIY Fixes Safely
Most bed squeaks come from loose hardware, dry wood joints, or a weak center support. Strip the bed, press on each section separately to find the exact spot, then tighten bolts first before adding any padding, lubricant, or wax.
If the noise follows the mattress itself when you move it to the floor, the fix below won’t help. That points to the mattress or box spring instead of the frame, and the section right after this one walks through how to tell the difference.
1. Tighten Every Bolt, Screw, and Bracket
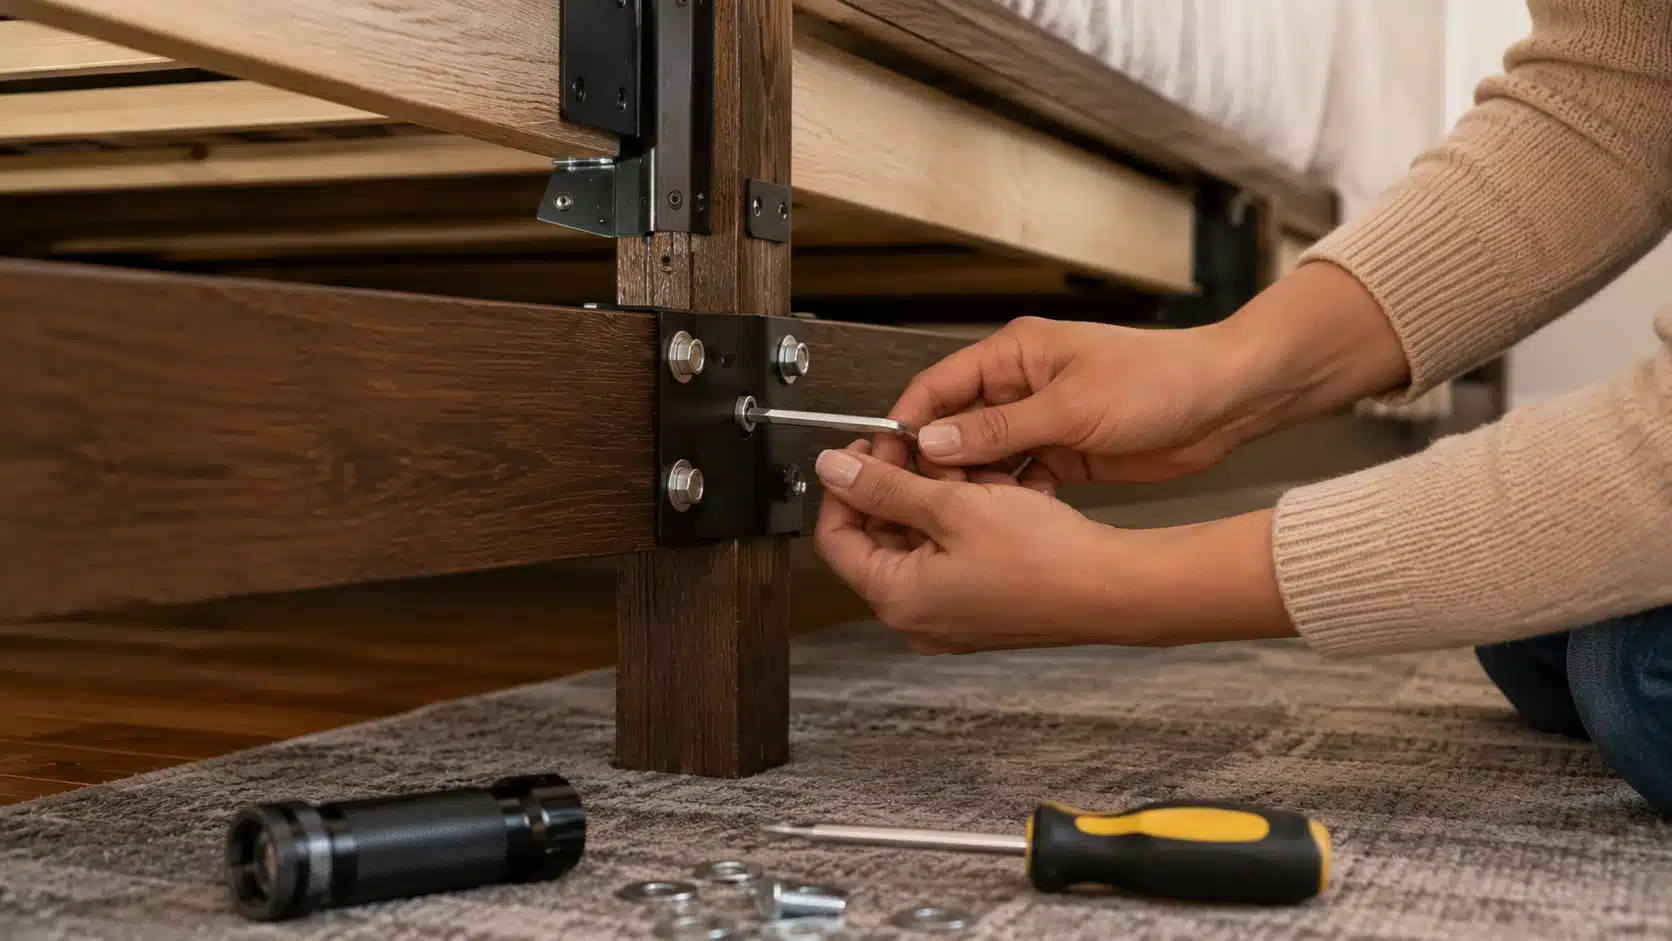
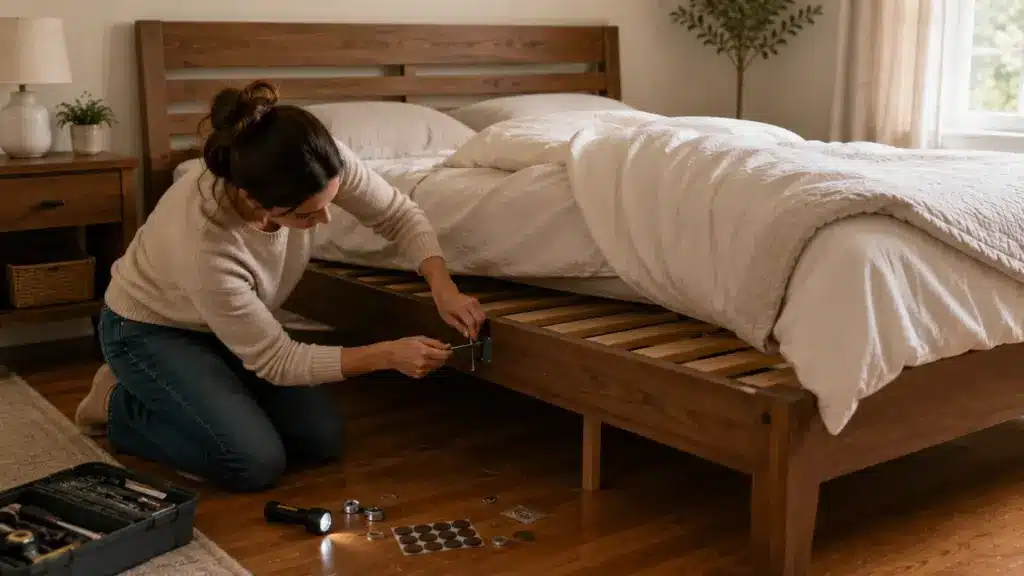
Loose hardware is the first place I check because it can make a sturdy bed sound broken. A frame shifts a little every night, and those small movements loosen joints. This method resets the structure before you add pads, wax, or any extra support pieces.
Tools you need: Allen wrench, screwdriver, socket wrench, flashlight
How to do it:
- Step 1: Remove the mattress so the full frame is easy to reach.
- Step 2: Check every corner bracket, side rail bolt, center beam connection, and headboard attachment.
- Step 3: Tighten each bolt and screw firmly, but do not force them so hard that the threads strip.
- Step 4: If a bolt spins without catching, add a washer or replace the fastener.
- Step 5: Test the frame before putting the mattress back.
2. Add Rubber or Nylon Washers Between Metal Parts
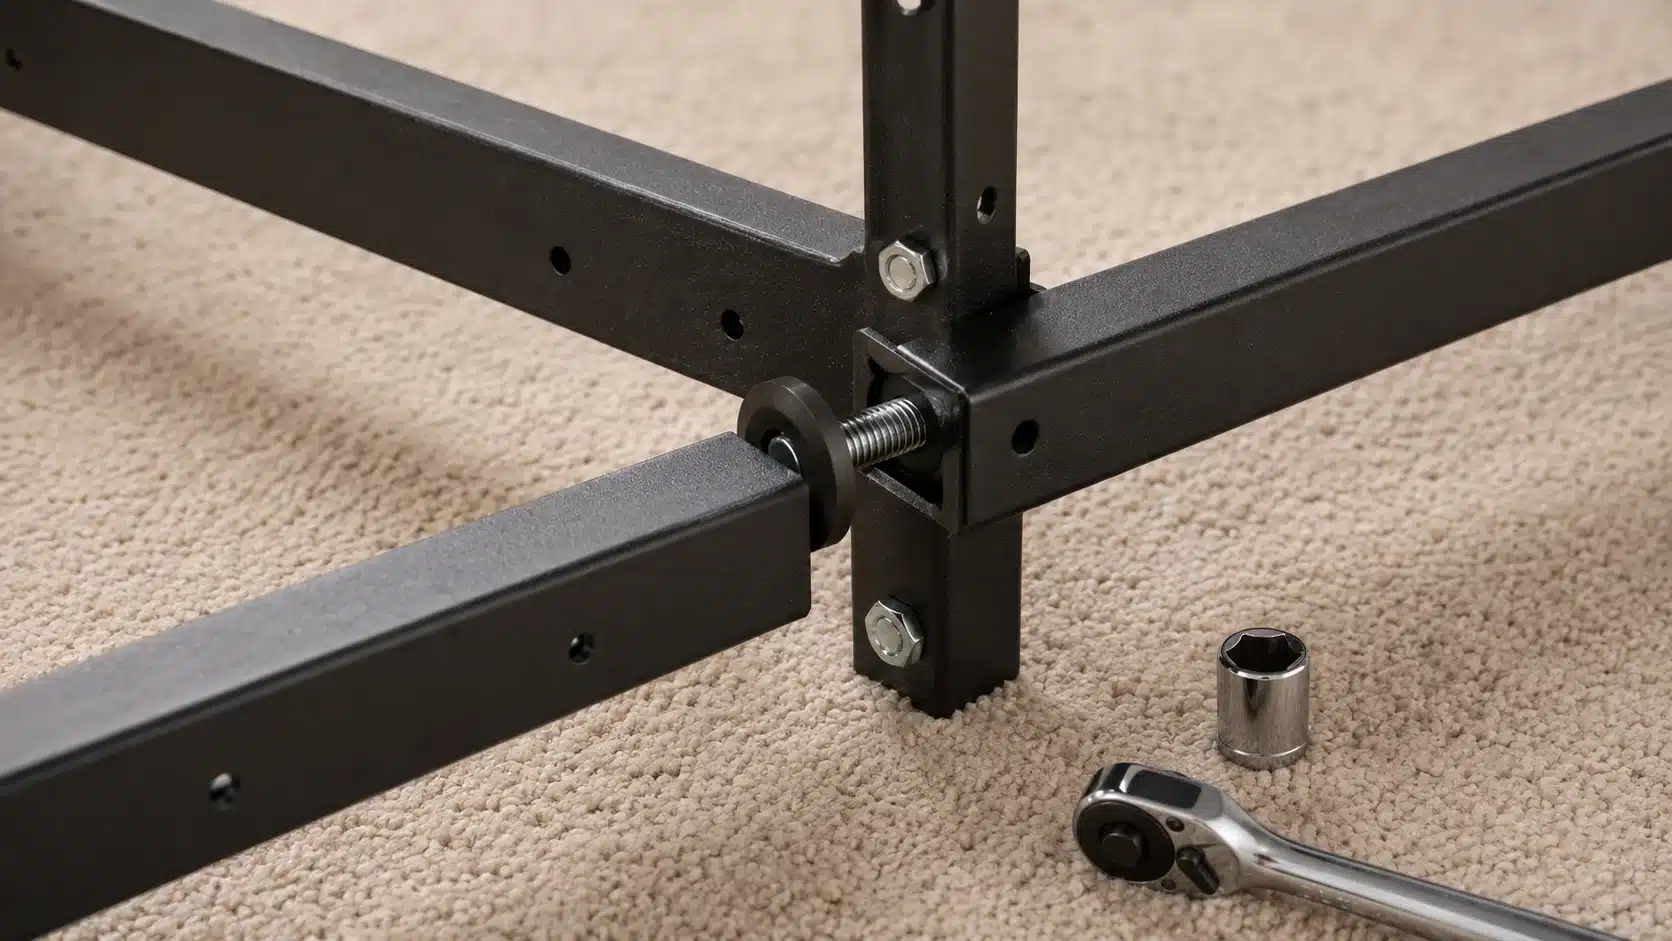
Washers help when the frame is tight, but metal still rubs against metal. They create a thin buffer inside the joint, so the parts can hold firm without scraping. This works best for rail plates, brackets, and bolts that squeak when moved repeatedly at night.
Tools you need: Rubber washers, nylon washers, socket wrench, screwdriver
How to do it:
- Step 1: Find the metal joint that squeaks when the frame moves.
- Step 2: Remove the bolt from that joint.
- Step 3: Slide a rubber or nylon washer between the metal contact surfaces.
- Step 4: Retighten the bolt so the joint feels firm and stable.
- Step 5: Avoid stacking too many washers because the connection still needs to stay secure.
3. Place Felt Tape or Cork Under Wood Slats
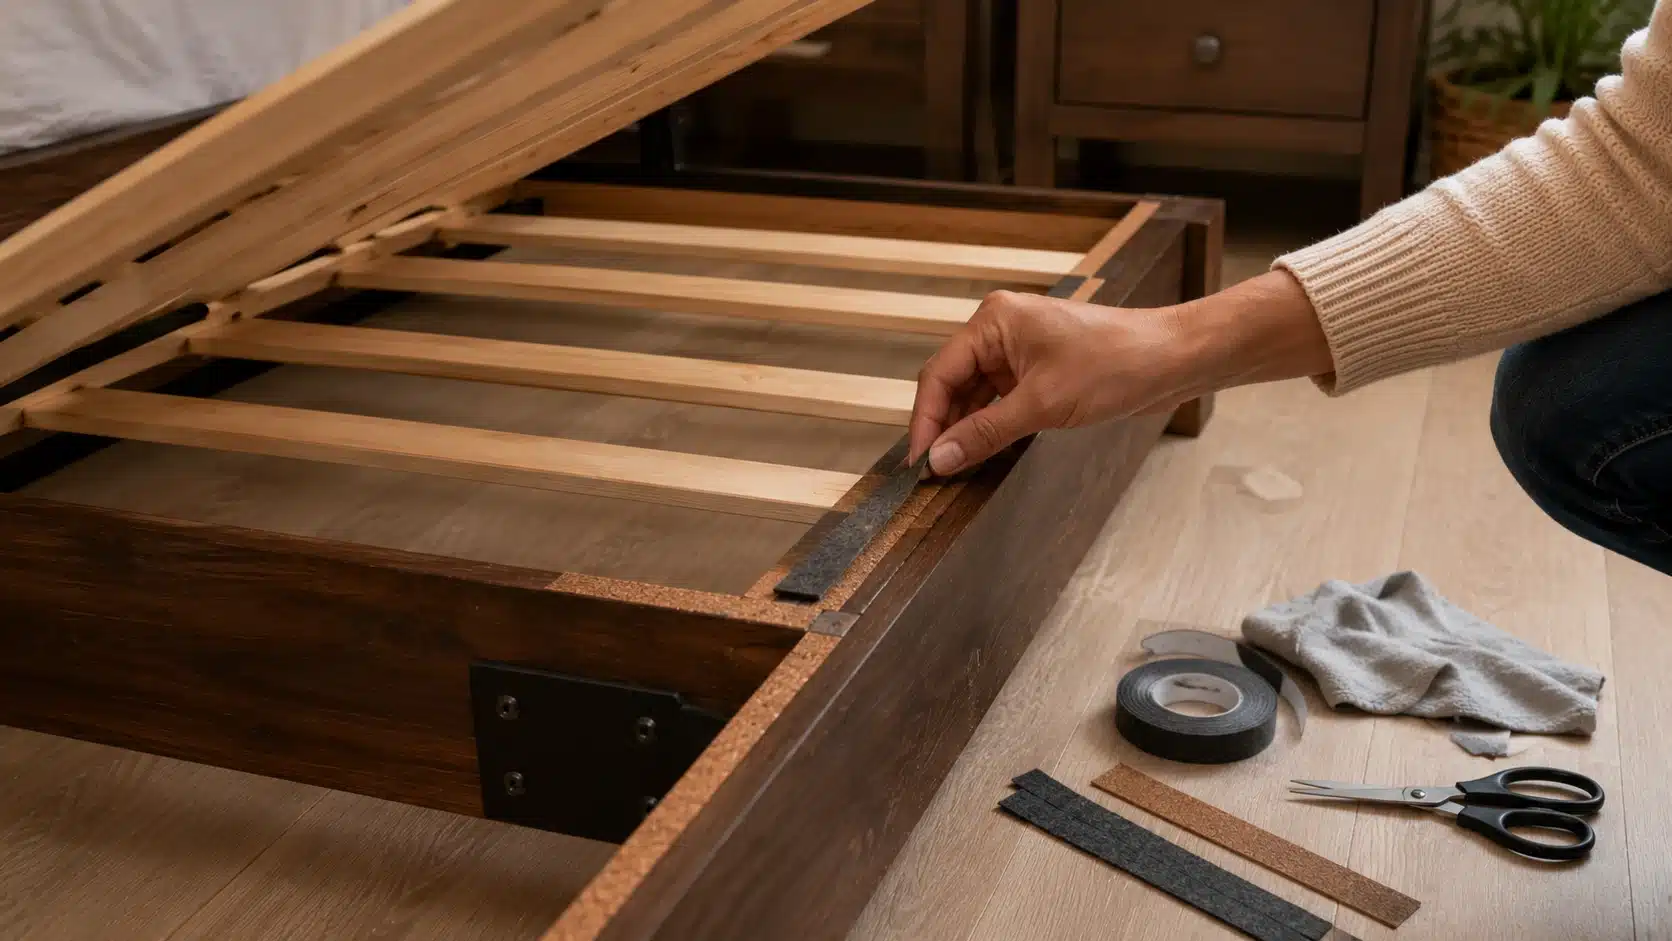
Slats often squeak because they sit directly on a hard rail ledge. Felt tape or cork does not repair a broken frame, but it quiets dry contact points. This method is useful when the bed creaks every time weight shifts across the slats at night.
Tools you need: Felt tape, adhesive cork, scissors, cleaning cloth
How to do it:
- Step 1: Lift each wood slat from the bed frame.
- Step 2: Wipe the rail ledge clean so the felt or cork sticks properly.
- Step 3: Cut thin strips of felt tape or adhesive cork to fit the contact points.
- Step 4: Apply the strips along the ledge where the slats rest.
- Step 5: Put the slats back evenly and check that they still sit level.
4. Apply Silicone Lubricant to Metal Joints
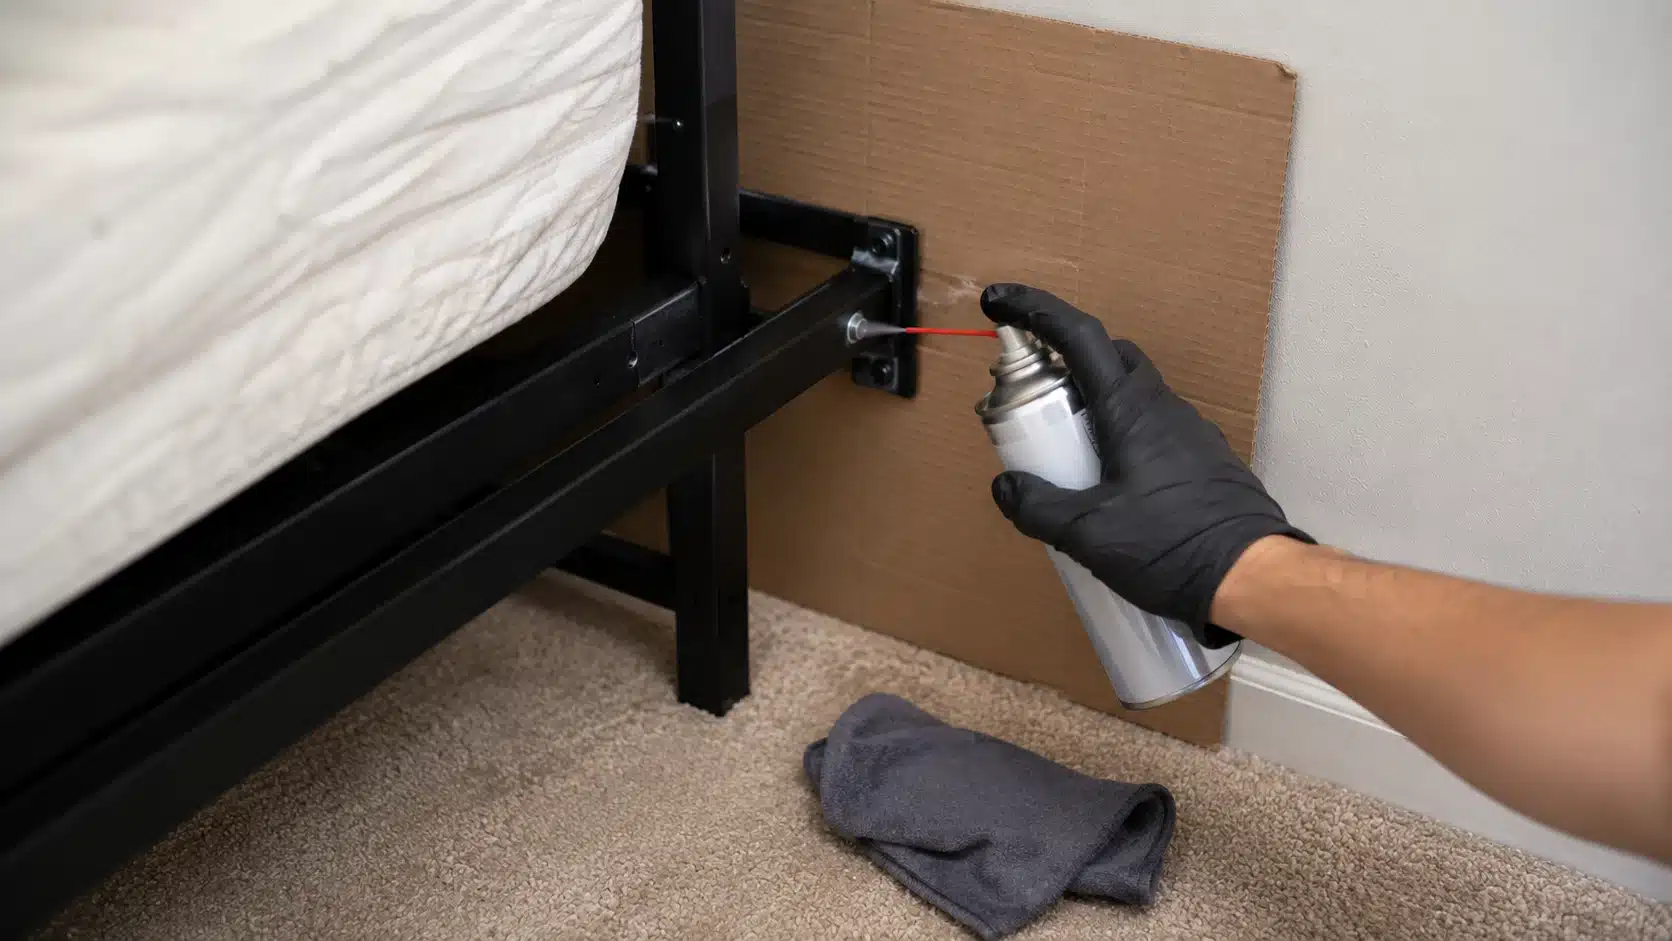
Silicone lubricant is for metal friction, not for every squeak. Use it after tightening, because loose hardware should not be hidden under spray. A light application can quiet brackets, rails, and metal joints while keeping the repair targeted and easier to clean later afterward safely.
Tools you need: Silicone lubricant, cloth, cardboard sheet
How to do it:
- Step 1: Use lubricant only on metal joints that still squeak after tightening.
- Step 2: Place cardboard behind the joint to protect the wall, floor, and bedding.
- Step 3: Spray a light amount of silicone lubricant onto the metal contact area.
- Step 4: Wipe away extra product with a cloth.
- Step 5: Let the room air out before putting the mattress and bedding back.
5. Rub Beeswax or Dry Soap on Wood Joints
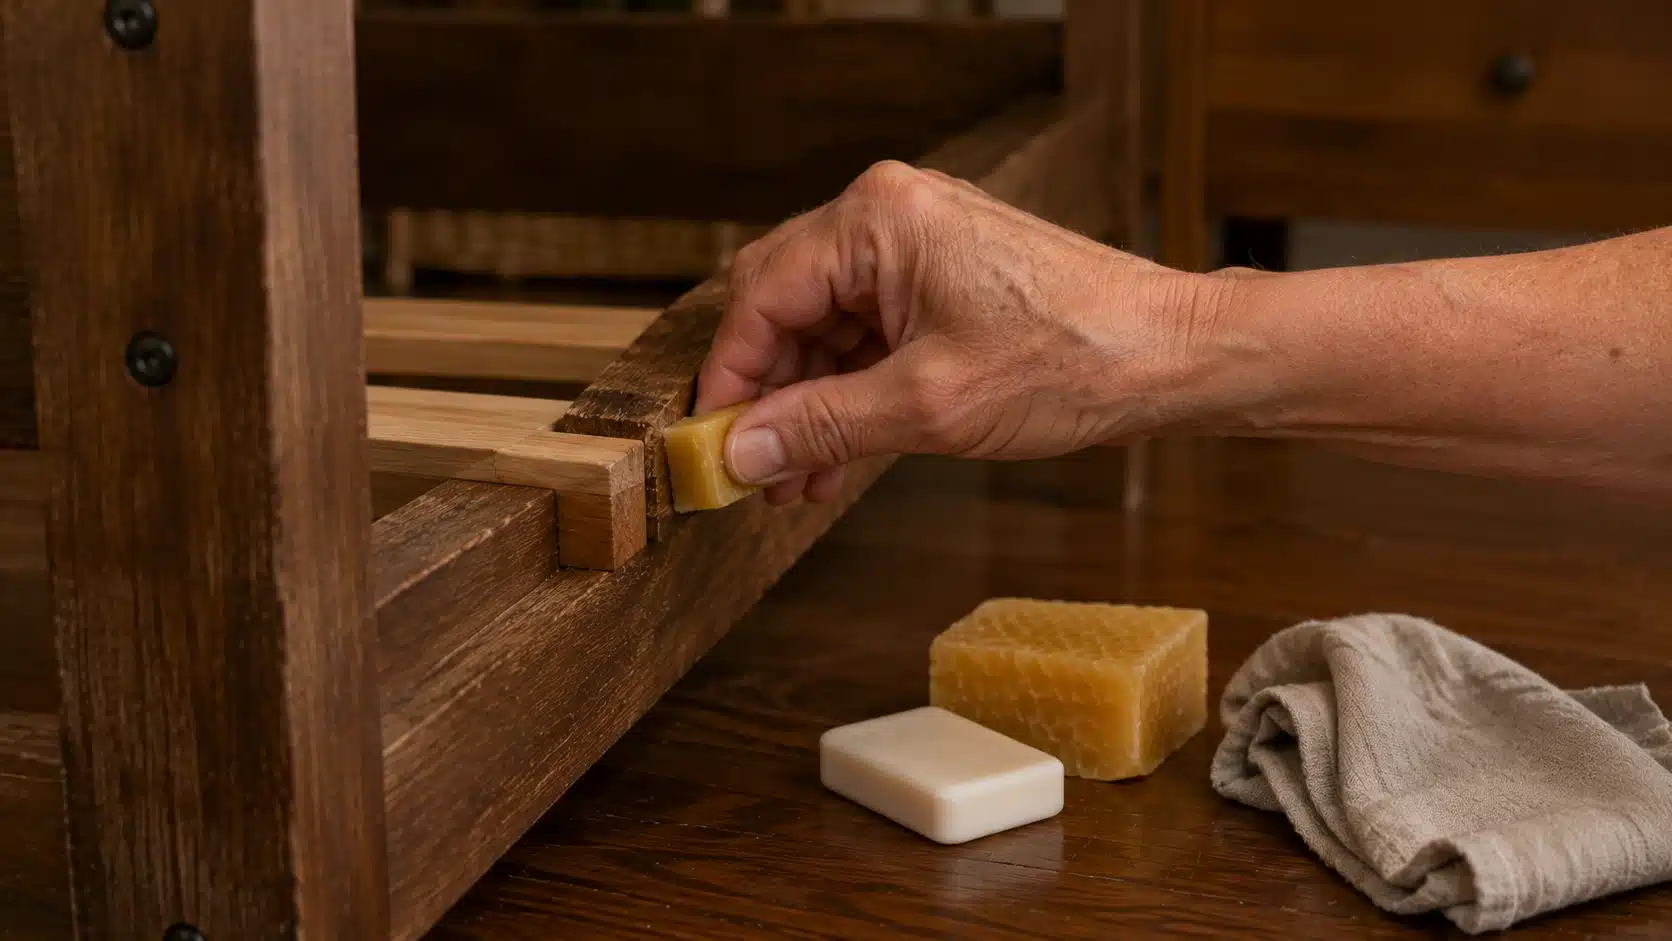
Wood joints need a dry friction fix, not wet oil. Beeswax, paraffin, or dry soap can make rubbing surfaces move quietly without soaking the wood. This method fits rail hooks, slat ends, and dry contact points that creak when the frame shifts under body weight.
Tools you need: Beeswax block, paraffin wax, or dry bar soap, cloth
How to do it:
- Step 1: Find the wood joint or slat end that is making noise.
- Step 2: Separate the joint if the frame design allows it.
- Step 3: Rub beeswax, paraffin wax, or a dry bar of soap onto the contact surfaces.
- Step 4: Reassemble the joint and tighten the hardware.
- Step 5: Avoid liquid oil on wood because it can affect the finish and collect dust.
6. Secure the Headboard and Add Wall Bumpers
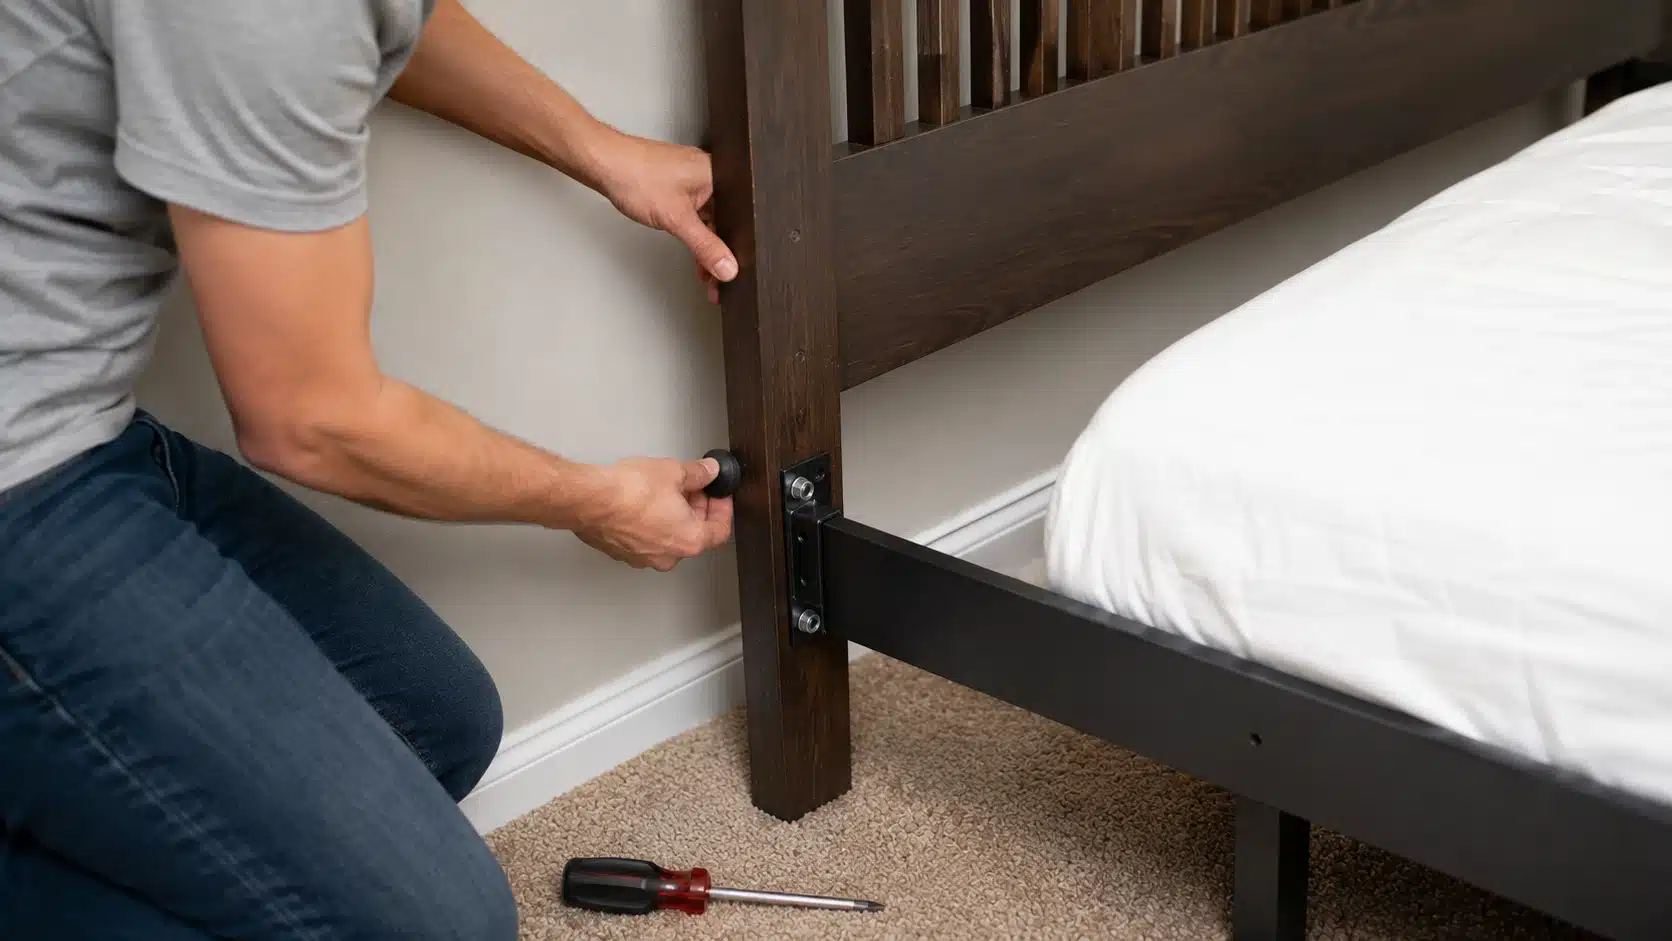
A headboard can be the loudest part of the bed, even when the frame is fine. It may squeak on the bolts or tap the wall when moving. This fix separates connection noise from wall contact, so the repair stays simple and easy to test.
If the movement keeps coming back no matter how often you tighten it, building a stable headboard from scratch is sometimes the more lasting fix.
Tools you need: Wrench, screwdriver, felt bumpers, rubber bumpers
How to do it:
- Step 1: Shake the headboard gently and listen for movement.
- Step 2: Check whether the sound comes from the bolt points or from the wall.
- Step 3: Tighten the headboard hardware first.
- Step 4: If the headboard taps the wall, add felt or rubber bumpers behind it.
- Step 5: Keep the bed close enough to feel steady, but do not wedge it tightly into the wall.
7. Reinforce the Center Support Rail
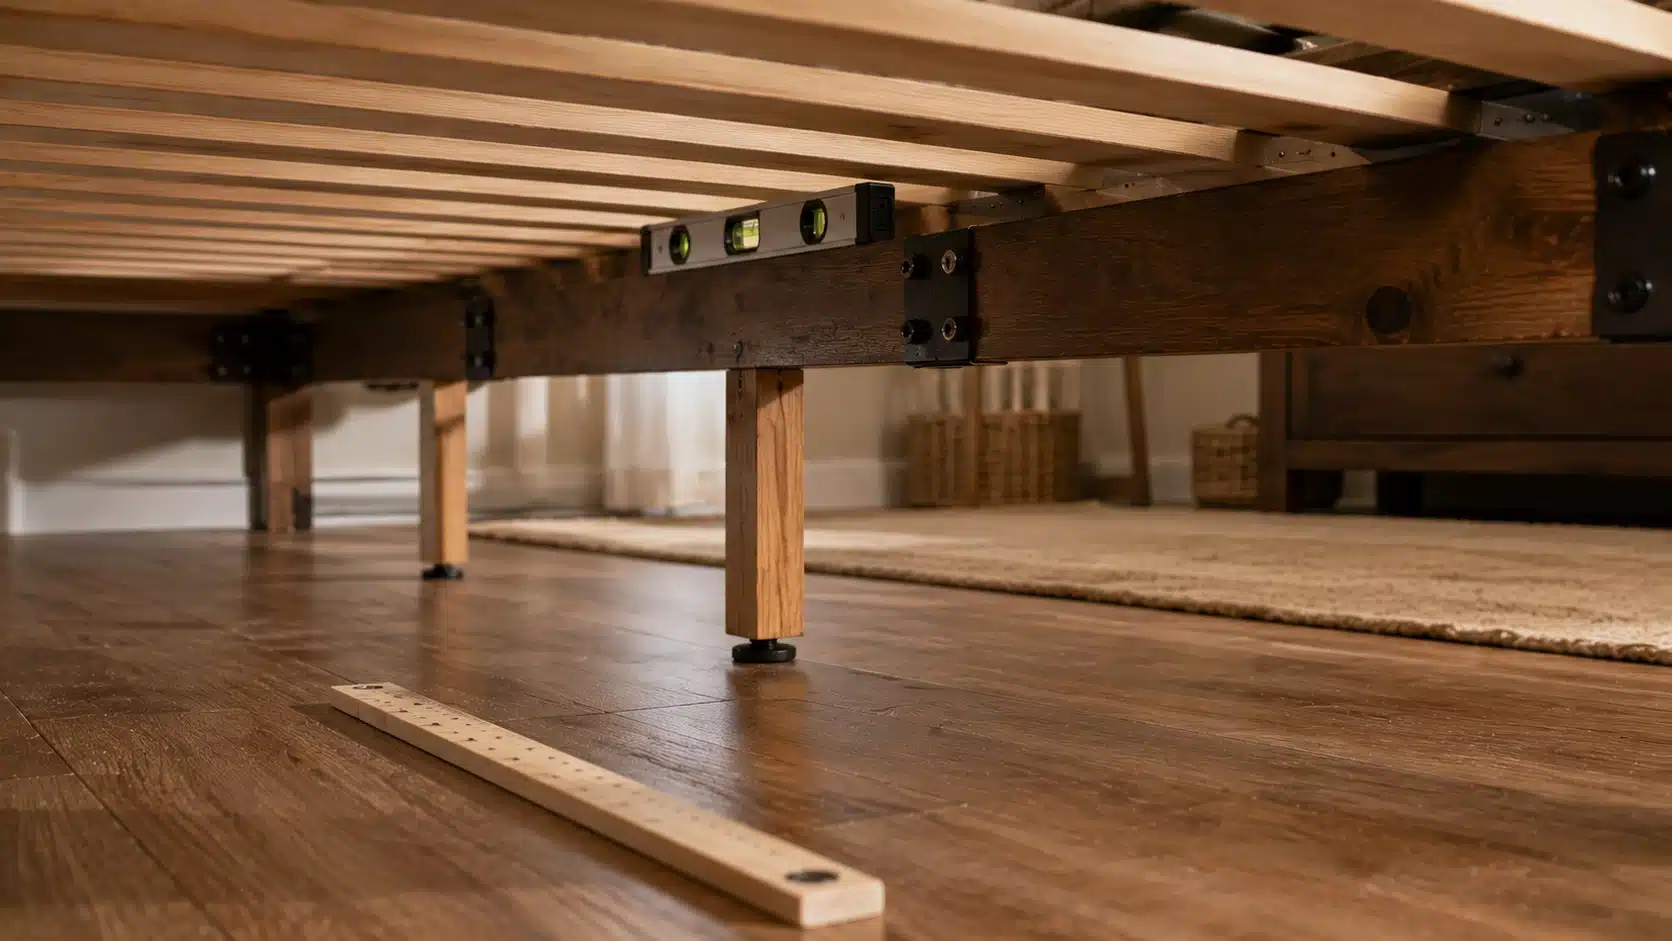
Center support matters because larger mattresses place heavy pressure across the middle of the frame. When that area flexes, the bed can creak even if corners are tight. This method strengthens the span instead of only quieting surface friction at the edges and joints.
Tools you need: Measuring tape, wood board, support legs with floor feet, screws, drill, level
How to do it:
- Step 1: Remove the mattress and look under the center of the frame.
- Step 2: Check whether the center rail bends or the support legs float above the floor.
- Step 3: Add proper support legs with floor feet if the middle section lacks support.
- Step 4: Replace a weak center rail with a stronger board cut to the right size.
- Step 5: Use a level to make sure the support sits evenly before retesting the bed.
8. Level the Bed Legs
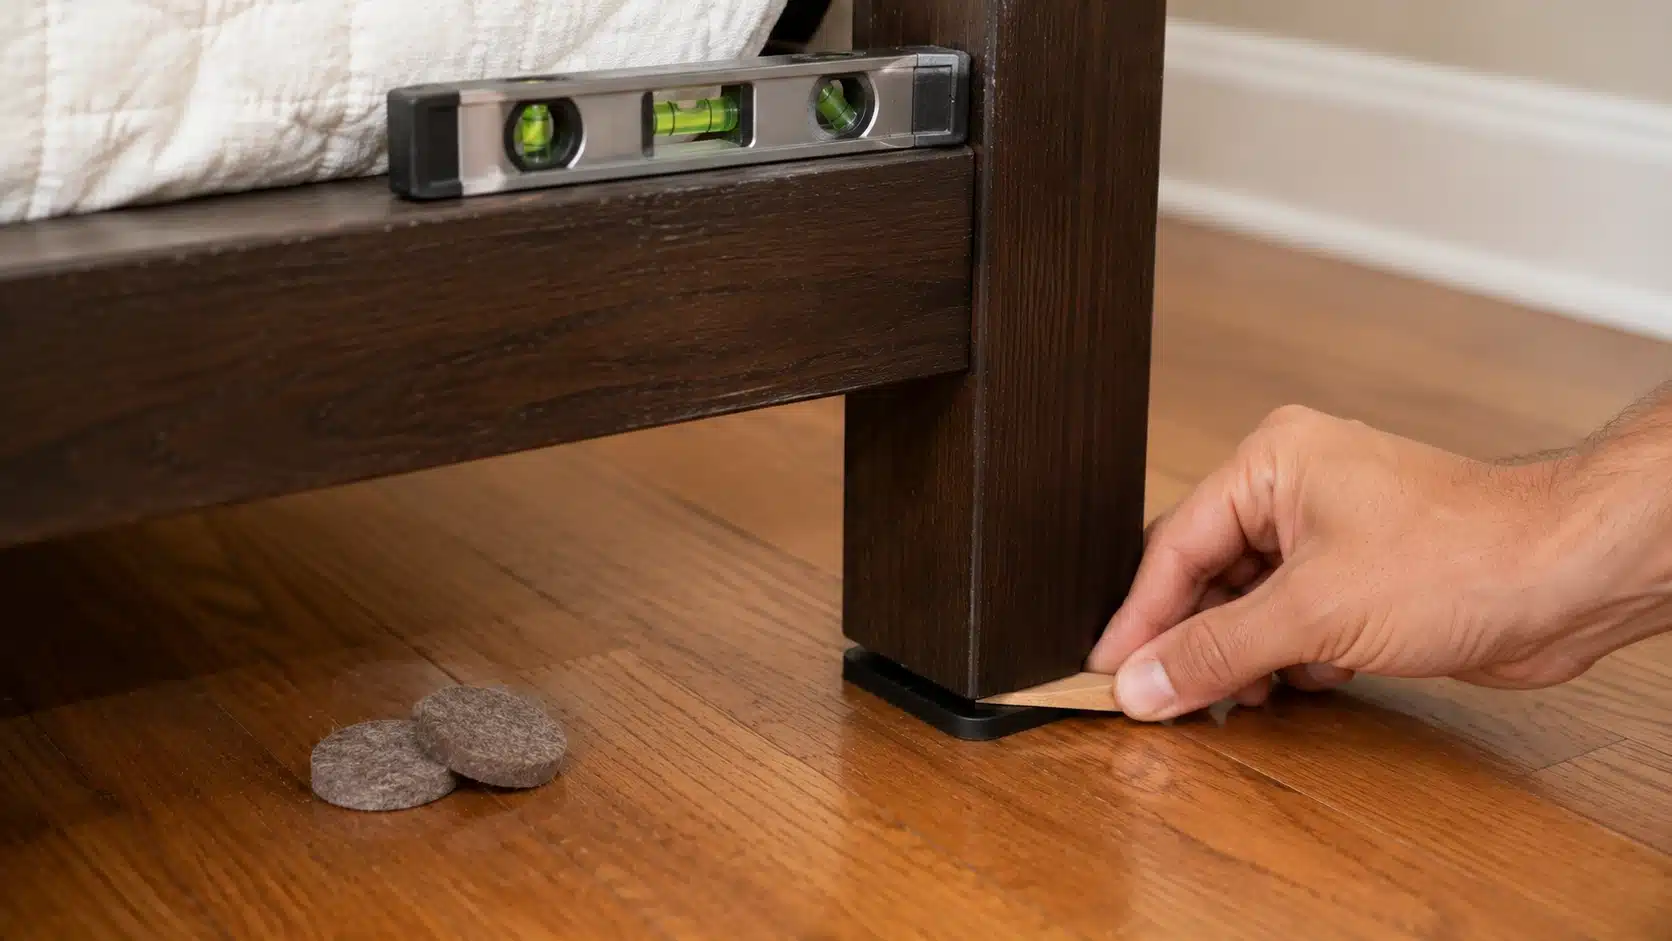
Sometimes the frame is not failing at all. One uneven leg can make the bed rock, scraping the floor or stressing corner joints. Leveling is a quick check that separates frame noise from floor contact before you spend time on larger repairs and extra materials later.
Tools you need: Level, felt floor pads, rubber pads, furniture shims
How to do it:
- Step 1: Place a level across the bed frame.
- Step 2: Check whether all legs make solid contact with the floor.
- Step 3: Add felt or rubber pads under legs that scrape, rock, or shift.
- Step 4: Use a furniture shim only where the floor is uneven.
- Step 5: Test the bed from each side to make sure the frame no longer rocks.
9. Tighten or Replace Loose Slat Holders
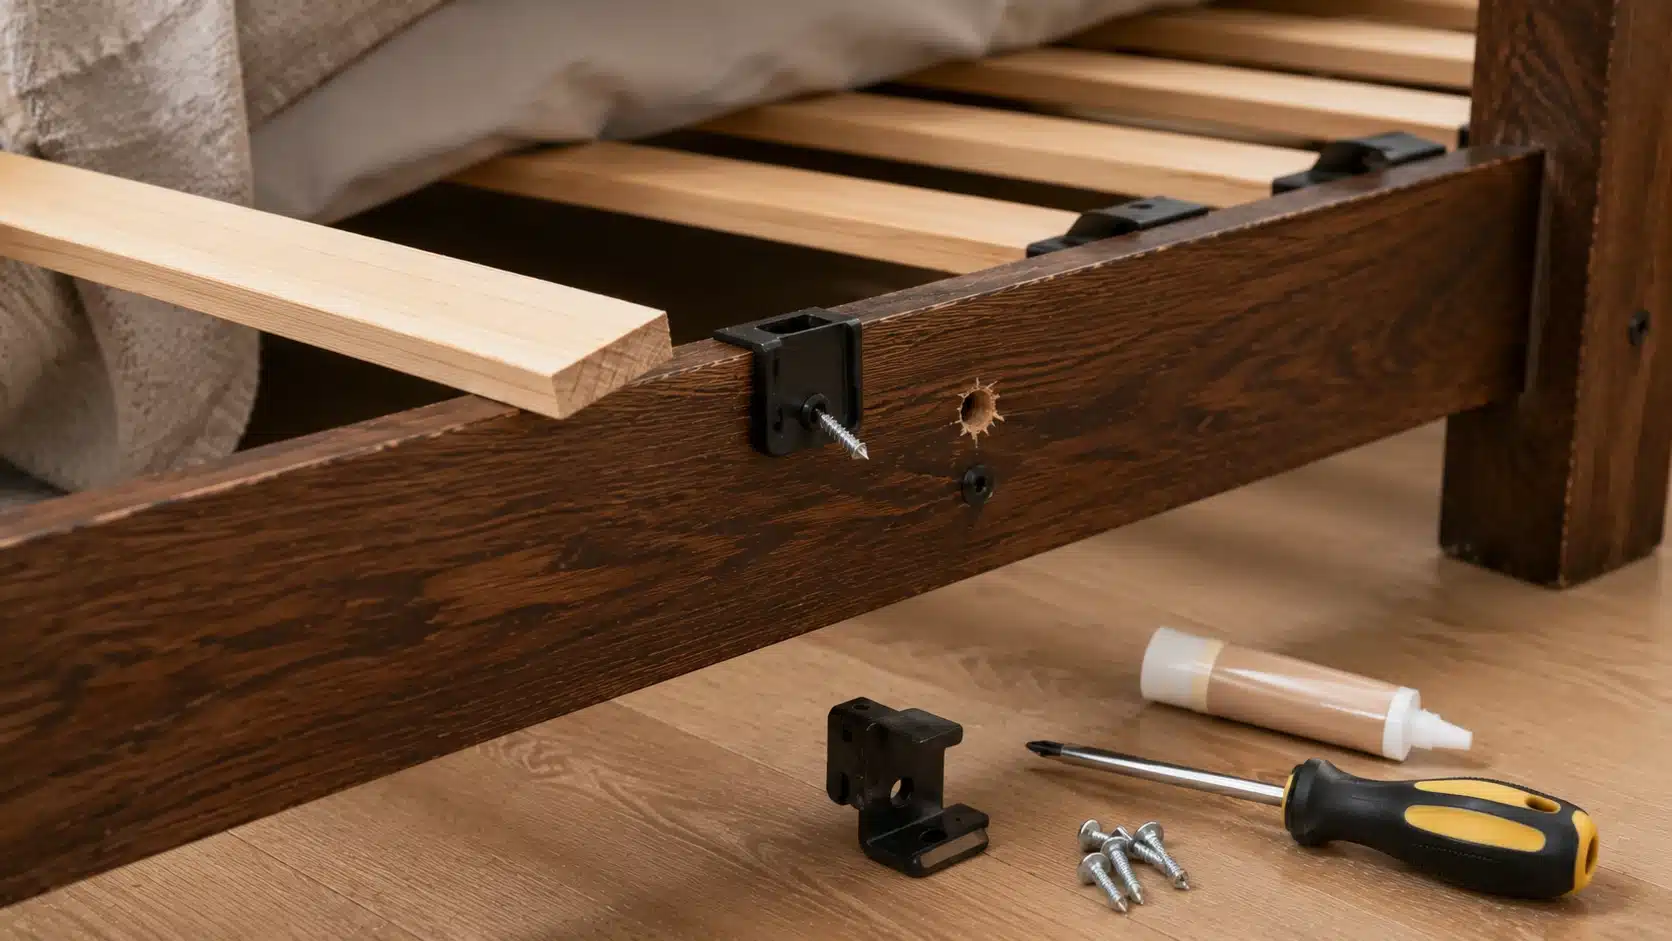
Slat holders can loosen before the slats themselves fail. When those small brackets shift, the support pieces move and make noise under pressure. This method targets the hidden hardware that holds the slats in place, which is easy to miss during a quick check alone.
Tools you need: Screwdriver, replacement screws, wood glue for stripped holes, clamps if needed
How to do it:
- Step 1: Remove the mattress and inspect the slat holders or ledge brackets.
- Step 2: Tighten the screws holding each bracket in place.
- Step 3: If screw holes are stripped, repair the holes before reinstalling the screws.
- Step 4: Replace missing or damaged screws with the correct size.
- Step 5: Avoid gluing slats permanently unless the frame design allows it.
10. Replace Warped or Cracked Slats
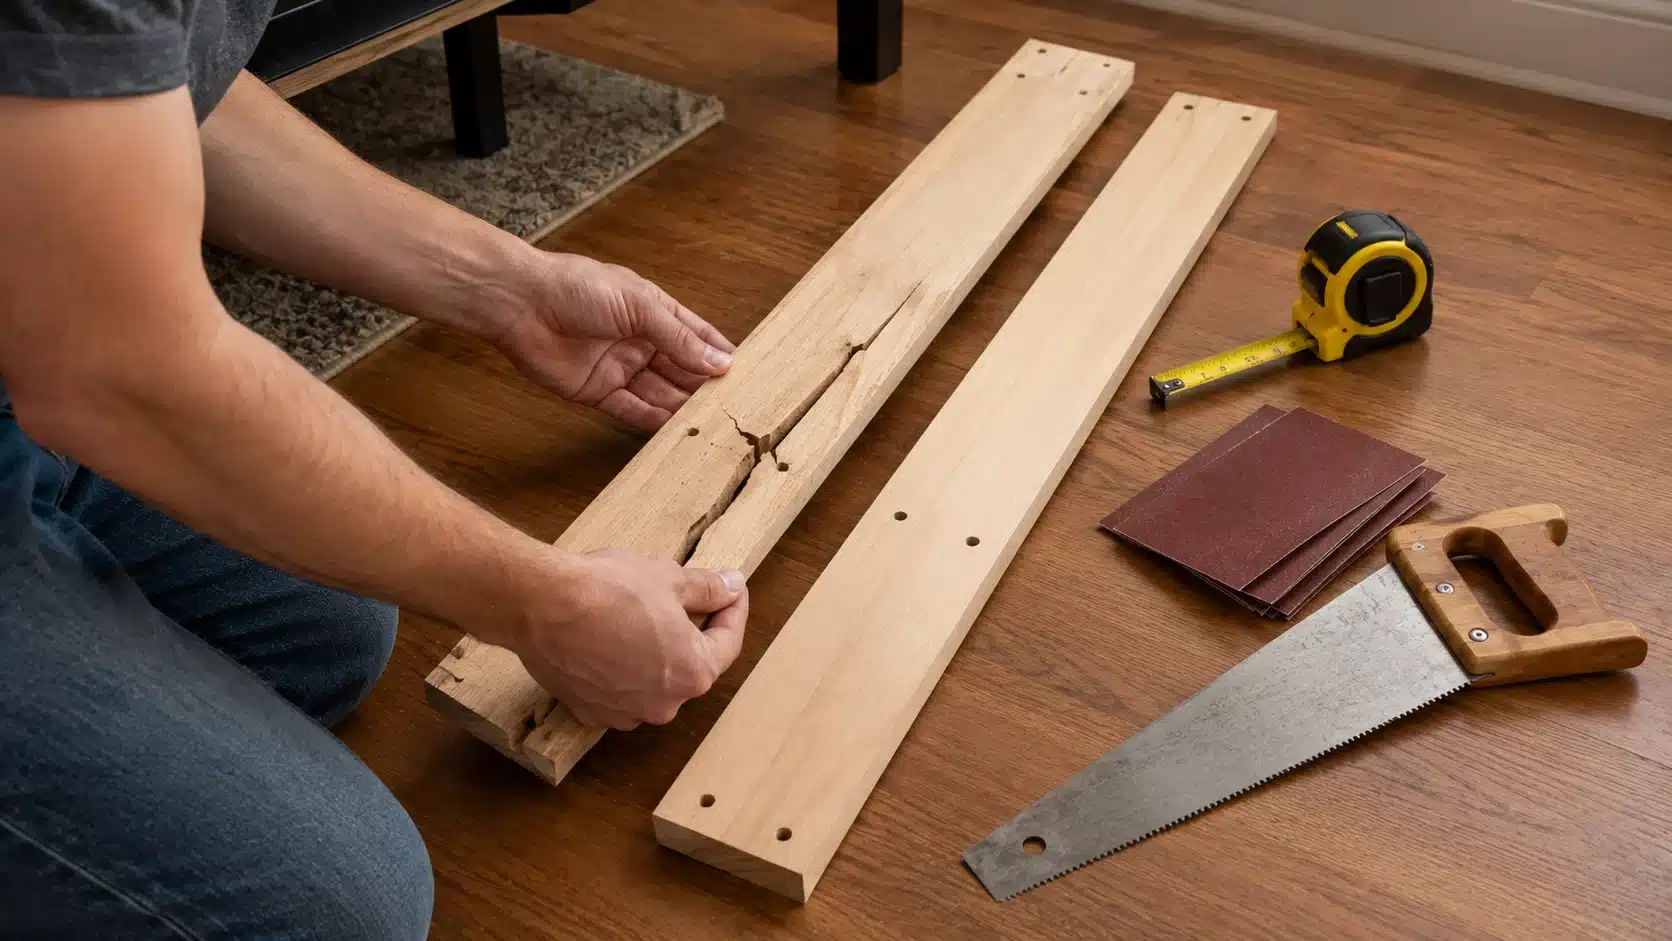
A cracked or warped slat can squeak because it flexes differently from the rest of the support system. Padding may quiet it briefly, but the weak piece remains. Replacing the damaged slat restores even support and prevents the same noise from returning at night.
Tools you need: Replacement lumber, measuring tape, saw, or hardware store cut service, and sandpaper
How to do it:
- Step 1: Remove each slat and inspect it closely.
- Step 2: Look for cracks, bowing, splintered ends, or uneven length.
- Step 3: Replace damaged slats with boards of the same thickness and width.
- Step 4: Sand rough edges before reinstalling the slats.
- Step 5: Keep the spacing even so the mattress has steady support across the frame.
11. Add a Bunkie Board or Plywood Support Panel
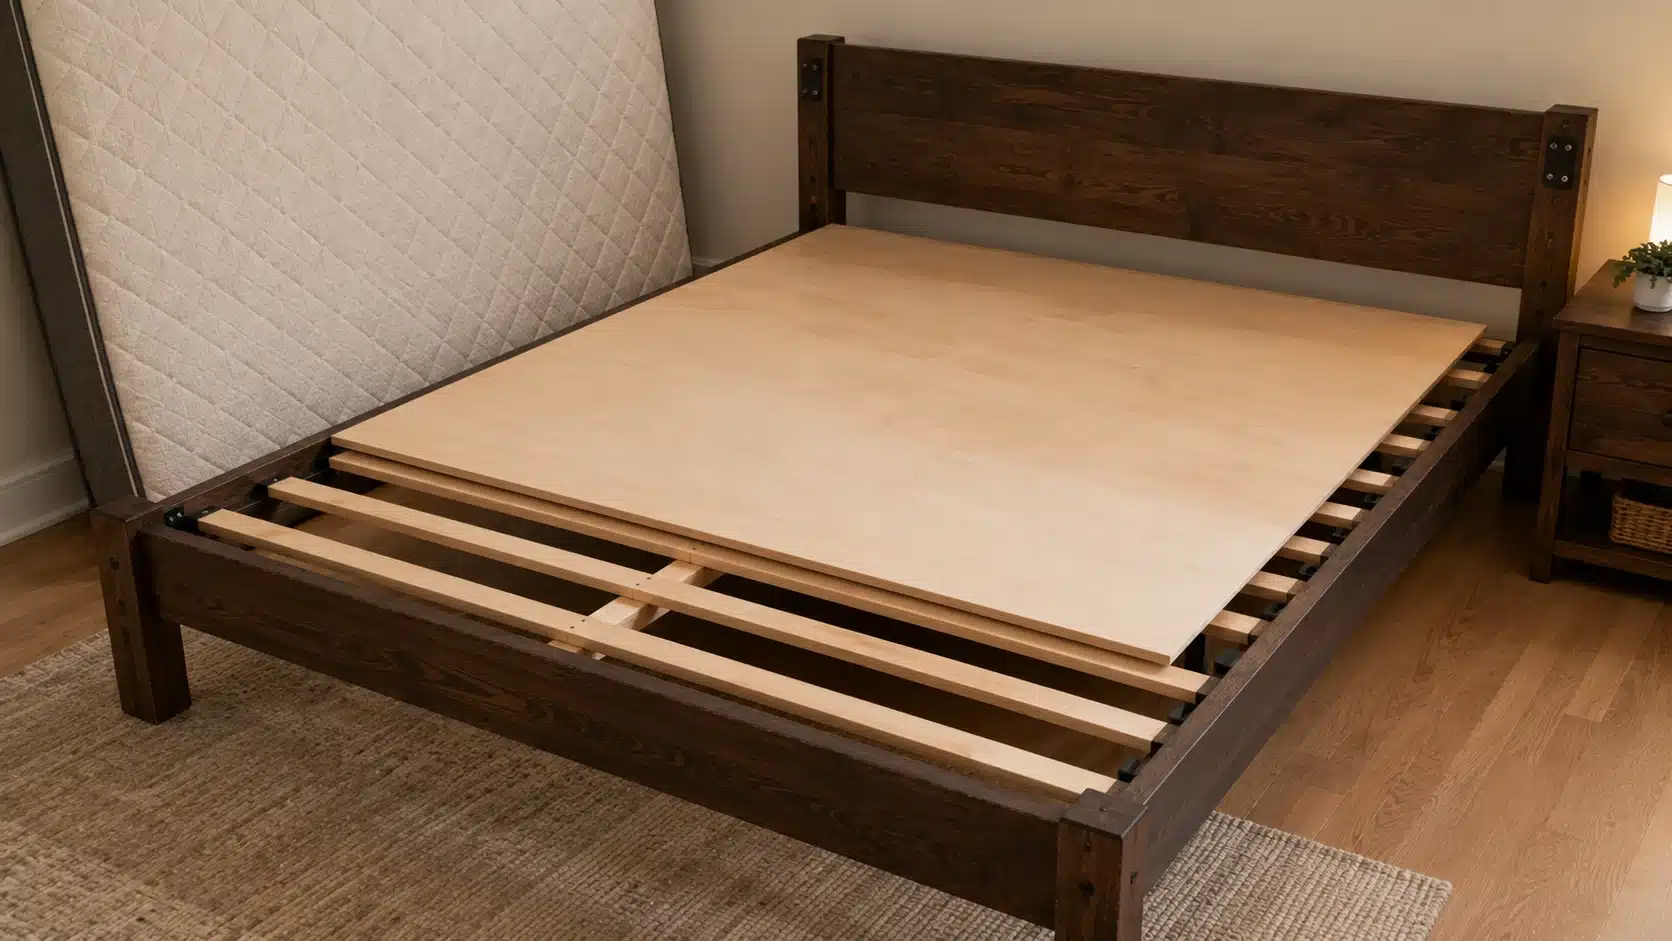
A support panel can reduce noise when many slats flex at once. It spreads pressure across a wider surface, which can help the mattress sit steady. This method is useful for solid frames, but the mattress support requirements should be checked carefully before installation.
Tools you need: Bunkie board or smooth plywood cut to size, measuring tape, sandpaper
How to do it:
- Step 1: Check whether the slats flex too much when weight is added.
- Step 2: Measure the support area inside the bed frame.
- Step 3: Add a bunkie board or smooth plywood panel between the mattress and slats.
- Step 4: Sand any rough plywood edges so they do not catch fabric.
- Step 5: Check your mattress care instructions first because some mattresses need airflow or specific support spacing.
12. Repair Side Rail Movement With Corner Braces
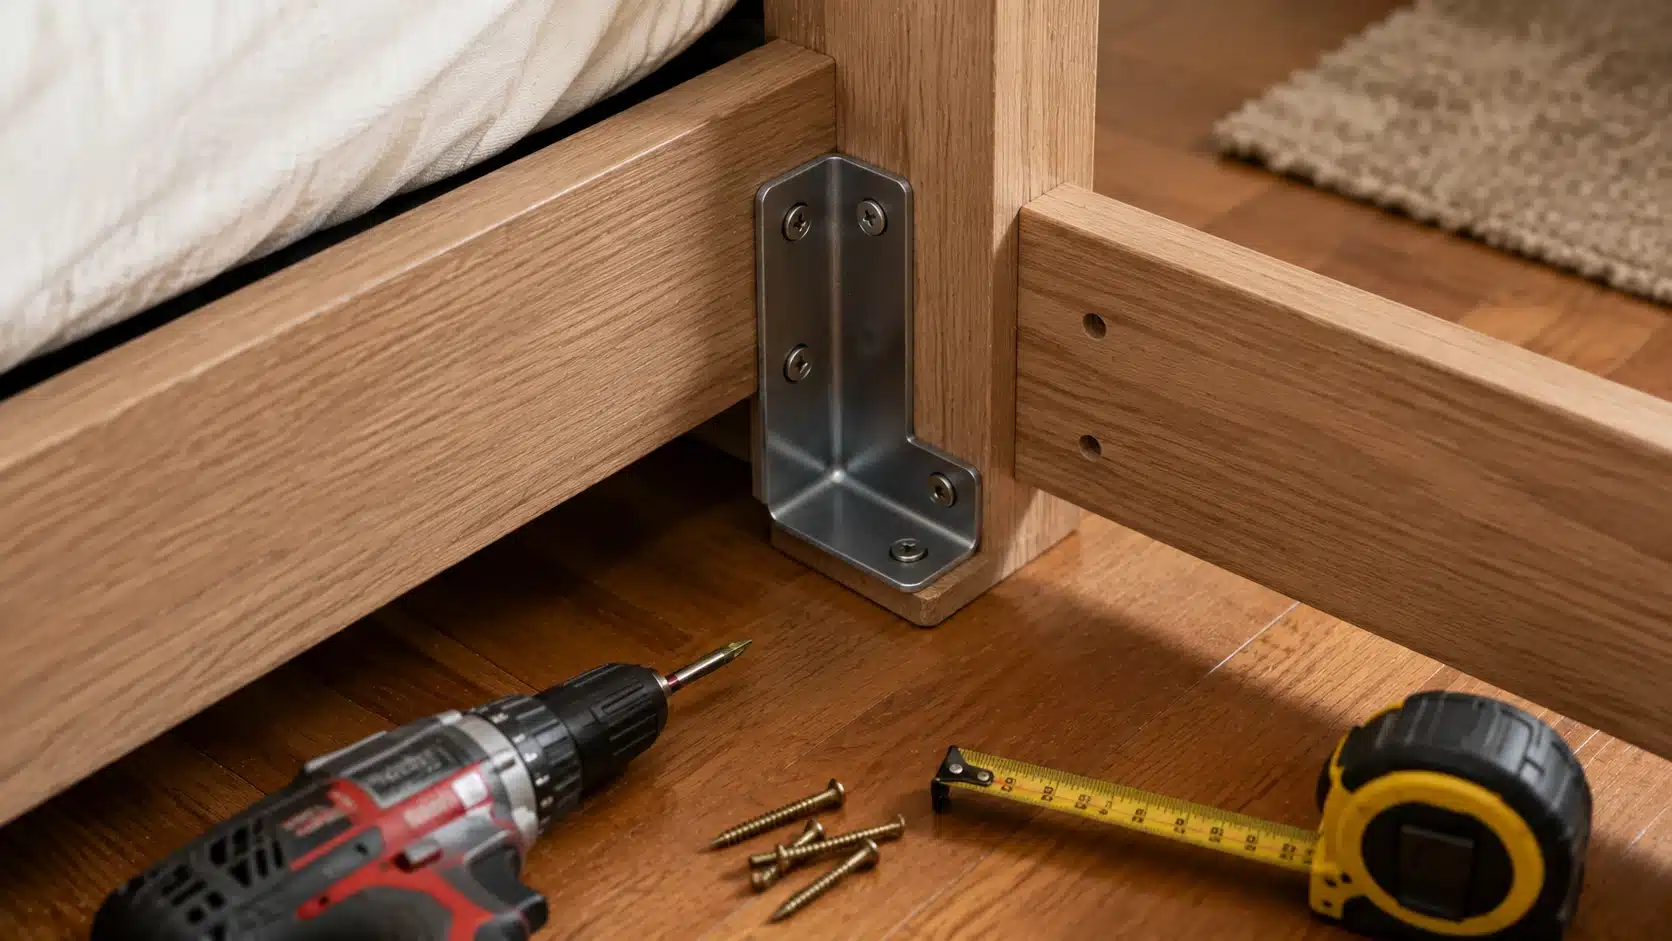
Corner braces are for frames that still twist after easier fixes have failed. They add structure where side rails meet the headboard or footboard. This method is more permanent than pads or washers, so use it only when movement is clearly coming from corners there.
Tools you need: Corner braces, screws, drill, screwdriver, measuring tape
How to do it:
- Step 1: Check whether the side rails twist or pull away from the corner joints.
- Step 2: Mark where the corner braces will sit inside the frame.
- Step 3: Pre-drill holes to reduce the risk of splitting the wood.
- Step 4: Attach the braces with screws that are the right length for the frame.
- Step 5: Use this more permanent fix only after tightening and padding have not solved the movement.
After each repair, test the bed before moving to the next method. That is the only reliable way to confirm which fix worked. The safest answer to how to stop squeaky bed noise is always diagnosis first, then one specific repair at a time.
What Users Say About Squeaky Bed Fixes

A Reddit thread is useful because it shows how people troubleshoot squeaky beds in real rooms, not showroom setups. The original poster said the frame squeaked loudly even when they rolled over, so the replies focused on quick checks and simple fixes.
The strongest advice was to find the source first. Commenters asked whether the noise came from the mattress, box spring, or frame, because each one needs a different repair. Once the poster confirmed the frame was the issue, several users suggested checking loose nuts, bolts, and brackets before trying anything else.
For metal frames, people mentioned rubber or plastic washers, small fabric buffers, and light lubricant at contact points. For beds with slats, one useful suggestion was adding support down the center so the slats move less. Another commenter noted that any added supports should have feet underneath, which helps keep the load steady and protects the floor.
The thread also included temporary ideas like putting the mattress on the floor, but that reads more like a short-term stopgap than a real repair. The main takeaway matches the safest DIY approach: identify the squeaky part, choose a fix that fits the material, and test the bed before adding more products or hardware.
Practical Tips That Keep the Bed Quiet Longer
Once the squeak is fixed, a few simple habits can stop the same noise from coming back. These tips focus on prevention, not repairs, so they help the frame stay stable after the main problem has already been handled.
| Tip | Why It Helps |
| Recheck hardware every few months | Beds loosen slowly from repeated movement and weight |
| Keep the mattress centered on the frame | Uneven weight placement stresses one side of the frame |
| Avoid dragging the bed across the floor | Dragging loosens brackets and can bend legs over time |
| Use floor pads on hard surfaces | Pads reduce leg movement and stop floor-contact scraping |
| Keep the center support legs straight | A tilted leg creates noise and reduces middle support |
| Check hardware after moving homes | Disassembly and reassembly commonly create new squeak points |
These habits prevent new squeaks from developing and reduce how often the repairs above need repeating. A quiet bed usually stays that way when the frame is kept tight, level, centered, and protected from unnecessary movement.
Can You Fix a Squeaky Bed Without Spending Much?
Yes, most squeaky bed repairs cost very little when the frame is not structurally damaged. Tightening hardware with tools already at home costs nothing.
Felt pads, rubber washers, beeswax, cork tape, and floor pads are all low-cost items available at most hardware stores. A small bottle of silicone lubricant covers most metal joint repairs.
The cost rises only when slats are cracked, center support rails need replacement, or the foundation has internal damage that cannot be patched from the outside.
The expensive mistake is buying products before knowing the source. Adding lubricant, padding, and supports to every joint before finding the actual problem often results in buying items that do not help and missing the one part that actually needs attention.
What Should You Try First Based on the Sound?
A squeaky bed is easier to fix when the sound is matched to the likely source. If you are trying to learn how to stop squeaky bed noise quickly, match the sound to the likely source before choosing a repair. The table below gives a simple first-check plan.
| What You Hear | Likely Source | First Fix to Try |
| Sharp metal squeak | Metal bracket or bolt | Tighten hardware, then add rubber or nylon washers |
| Low wood creak | Slats or wood joints | Add felt, cork, beeswax, or dry soap at contact points |
| Noise near the wall | Headboard | Tighten headboard bolts and add wall bumpers |
| Noise in the middle | Center support | Check support legs, center rail, and slat flex |
| Scraping near the floor | Bed legs or flooring | Add floor pads and level the frame |
Use this table as a starting point, not the final diagnosis. Bed noises can travel through the frame, so the loudest area is not always the true problem spot. Test one fix at a time, listen again, and move to the next repair only if the sound remains.
Mistakes to Avoid When Silencing a Noisy Bed
Many squeaky bed fixes fail because the same treatment gets applied to every type of noise. Knowing which mistakes to skip saves both time and supplies.
- Using oil on every material: Metal joints can handle silicone lubricant, but wood surfaces, fabric-covered rails, and bedding contact areas should not be soaked with any liquid product.
- Ignoring the center support: Tight corner hardware will not fix a bed that sags or flexes in the middle. Center support must be checked as a separate step from corner tightening.
- Adding thick padding under slats: Too much felt or foam under slats raises them unevenly and affects how the mattress distributes weight. Use only thin material at contact points.
- Forgetting the floor: A solid frame can still produce scraping and rattling noise when the legs touch bare hardwood or tile directly. Floor contact is worth ruling out early before taking the frame apart.
- Tightening stripped screws repeatedly: If a bolt or screw turns without catching, more force will not help. The hole needs proper repair before the hardware can be held again.
- Skipping the test after each fix: Testing after every individual repair confirms which one actually worked. Fixing everything at once makes it impossible to know what the real problem was.
When Is a Squeaky Bed Not Worth Repairing?
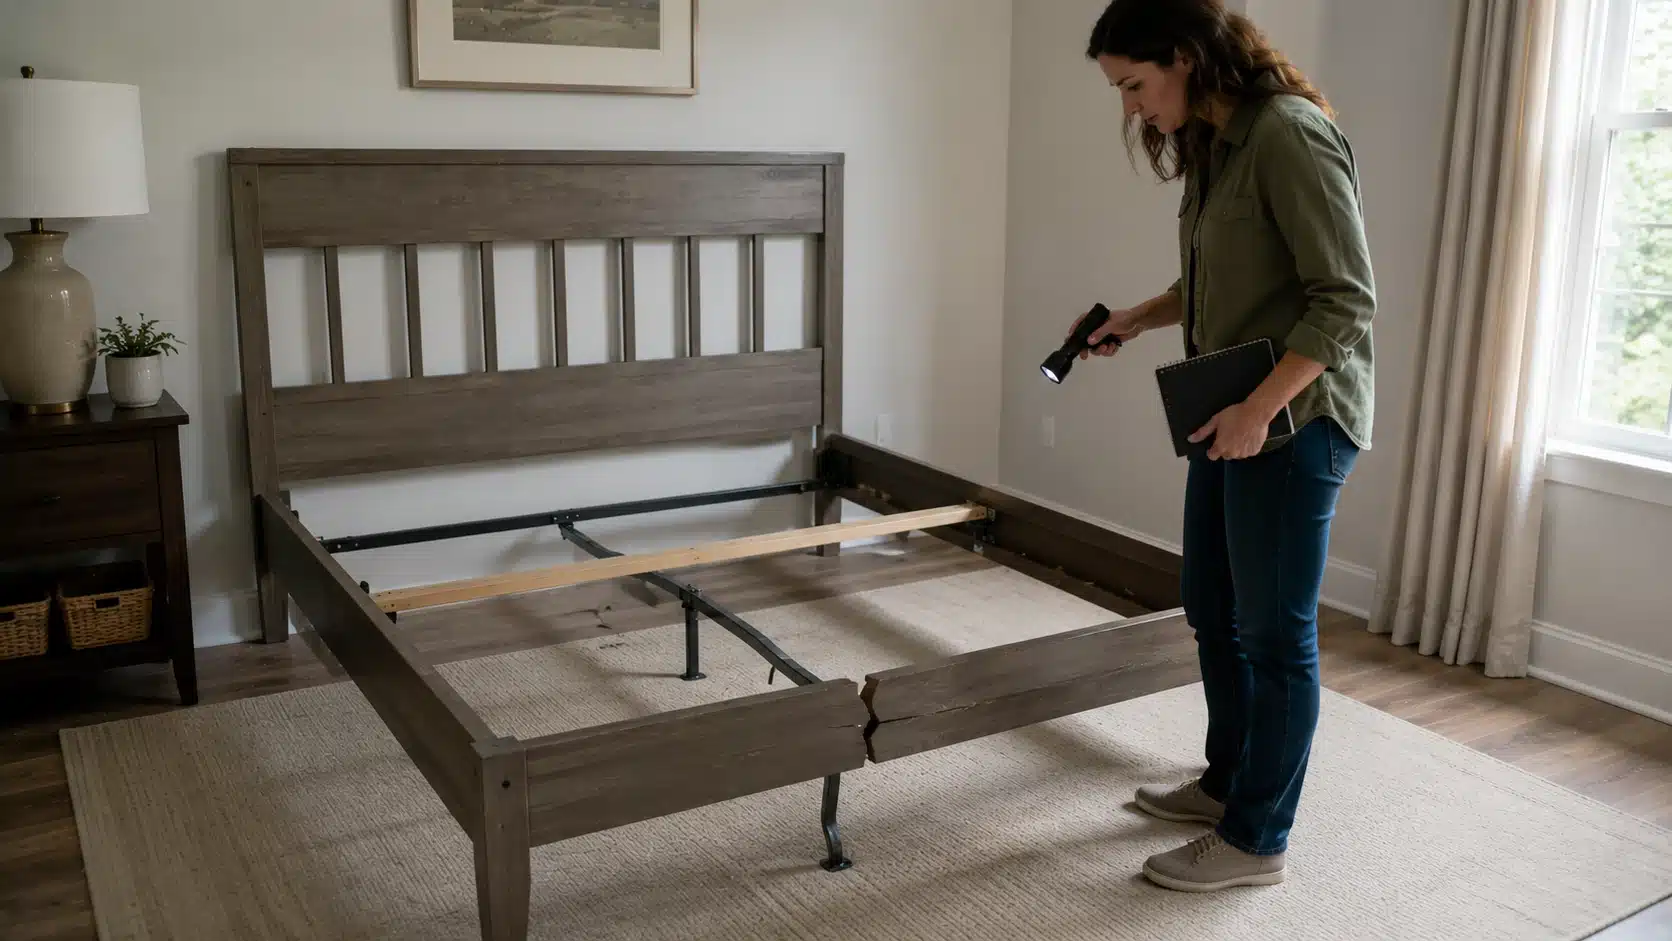
DIY repair is not worth pursuing when the bed frame has a cracked structural rail, a bent metal post, a center support that keeps failing regardless of leg adjustment, or a box spring with broken internal supports.
These are not friction problems. They are load-bearing failures.
If the bed still rocks, dips in the middle, or shifts side to side after proper hardware tightening and support reinforcement, the frame may have reached the end of its useful life.
That is not a failure of the repair process. It is useful information that saves time and prevents sleeping on an unsafe structure.
Frequently Asked Questions
Does the type of bed frame affect which fix to try first?
Yes, material matters. Metal frames usually squeak from loose bolts or metal contact, so tightening hardware and adding washers are the first steps. Wooden frames more often creak from joint friction, so beeswax or felt pads tend to help. Knowing the frame material helps narrow the fix before testing each joint.
Can a box spring cause the same noise as a frame squeak?
Yes. A box spring has its own internal wooden frame and coil supports, which can loosen and squeak independently of the bed frame. Test the box spring by pressing on it directly without the mattress. If it squeaks on its own, the source is internal and may need a new box spring or a solid foundation replacement.
How do I stop slats from shifting sideways on metal rails?
Slats on metal rails can shift because the ends are not secured. Add a thin strip of felt or adhesive rubber to the rail ledge so the slat has grip instead of sliding. Some frames include plastic slat holders that clip onto the rail. Replacing missing or broken holders is usually the cleanest long-term fix for this problem.
Is beeswax safe to use on all wood bed frames?
Beeswax is generally safe for bare or finished wood joint surfaces. It does not damage most finishes, does not attract insects, and stays dry rather than soaking into the wood. It works best on disassembled joints or slat ends. Avoid using it on painted surfaces if the color needs to stay clean, because the wax can leave a visible residue.
Can a squeaky bed affect sleep quality over time?
Yes. Even small noise interruptions can reduce sleep depth over time. Sounds that are too quiet to fully wake a person can still pull the body out of deeper sleep stages. Fixing the squeak removes that recurring trigger and allows sleep to remain uninterrupted through normal body movement during the night.
Final Thoughts
The repair order matters as much as the fix itself. Strip the bed, find the source, then tighten hardware before adding anything else. Loose bolts are the most common reason for squeaking, and they cost nothing to fix.
After hardware is secure, address friction with felt, cork, washers, or wax depending on the material involved. Then check center support, floor contact, and headboard movement before moving to more involved repairs like corner braces or plywood panels.
Knowing how to stop squeaky bed noise properly means working through those steps in order rather than applying every product at once. Learning how to fix a squeaky bed is almost always simpler than it sounds once the source is isolated.
Use the checklist above tonight, start with the loudest joint, and fix only the part that is actually making the noise.