If you’ve ever woken up on a deflated air mattress, you know how frustrating it can be. A small hole or puncture can turn your comfy bed into a sagging mess, leaving you with a less-than-ideal night’s sleep. But don’t worry, fixing it yourself is easier than you might think, and you don’t need to replace the entire mattress.
I’ll guide you through everything you need to know about ‘how to patch an air mattress.’ From finding that elusive hole to applying the right patch, I’ll cover how to fix a hole in an air mattress, use a patch kit, and use household items like super glue, as well as methods for repairing fuzzy surfaces.
By the end of this guide, you’ll have your mattress back to full comfort, ready for another peaceful, undisturbed sleep. Let’s get started!
Why It’s Worth Repairing Your Air Mattress Yourself
Repairing your air mattress yourself is not only cost-effective, but it’s also a simple process that can save you the hassle of buying a new one.
Instead of throwing out a mattress because of a small leak or puncture, you can fix it yourself, extending its lifespan and saving you money on a replacement. Plus, it’s a quick fix that doesn’t require many specialized tools or expertise.
With a little time and the right materials, you can patch up a hole and get your mattress back to working condition in no time.
Taking the DIY approach not only saves you money but also helps you avoid unnecessary waste. It’s a practical and eco-friendly solution!
How to Patch an Air Mattress
How to fix a hole in an air mattress? Fixing a hole in an air mattress doesn’t have to be difficult. With the right materials and steps, you can easily repair it yourself, saving time and money while restoring your mattress to full comfort.
| Material | Purpose |
|---|---|
| Patch kit or vinyl patch | For sealing the hole securely |
| Soapy water | To locate the leak by forming bubbles |
| Isopropyl alcohol | To clean the area around the hole |
| Sandpaper or acetone-based nail polish remover | For smoothing fuzzy surfaces before patching |
| Liquid sealant (Seam Grip) | To seal smaller holes or cracks |
| Super glue or waterproof glue (optional) | For a temporary fix in emergency situations |
| Heavy object (e.g., books) | To press down on the patch while it cures |
Step 1: Locate the Hole

To locate the hole, fully inflate your mattress. Then spray a soapy water mixture across the surface. As air escapes, bubbles will form at the leak.
If the hole is small or hard to spot, gently press on different areas and listen for escaping air. Once located, mark the spot with a marker or tape.
Step 2: Prepare the Mattress for Repair
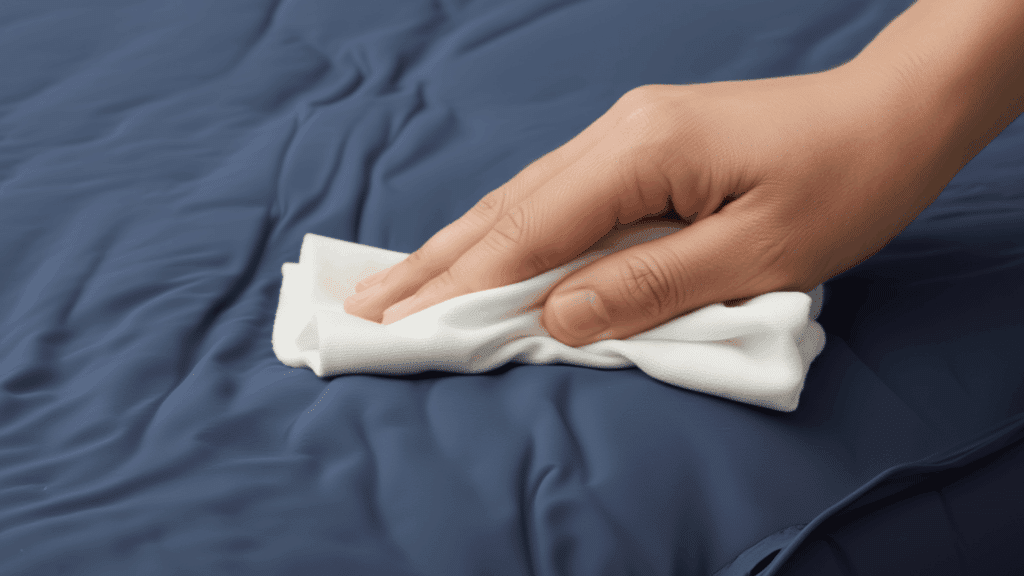
After locating the hole, deflate the mattress completely. It’s important to remove all air for a proper repair. Clean the area around the hole with isopropyl alcohol and a cloth to remove any oils, dirt, or residues.
If the mattress has a fuzzy surface, gently sand it or use acetone-based nail polish remover to smooth it for better adhesion.
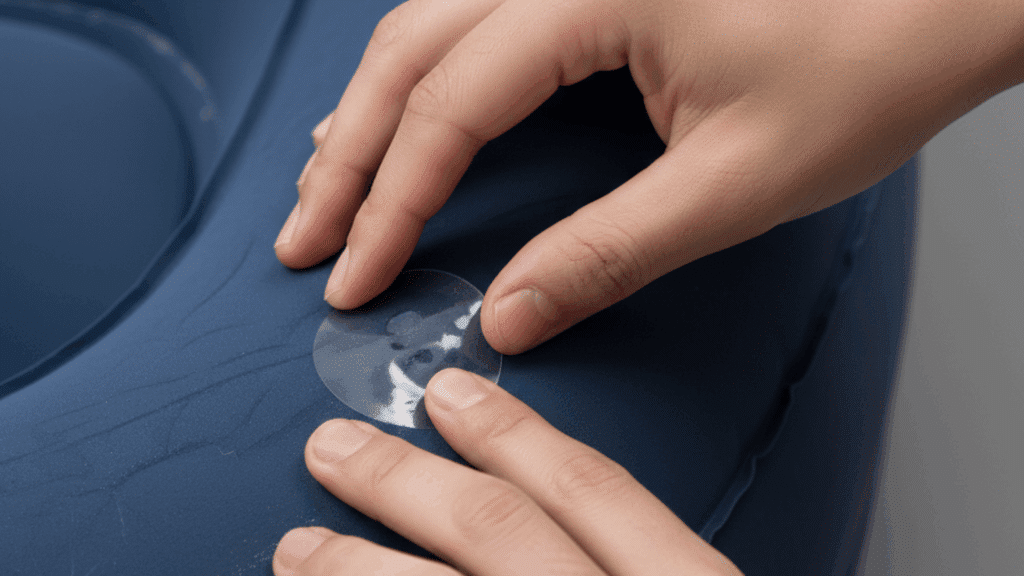
Step 3: Apply the Patch
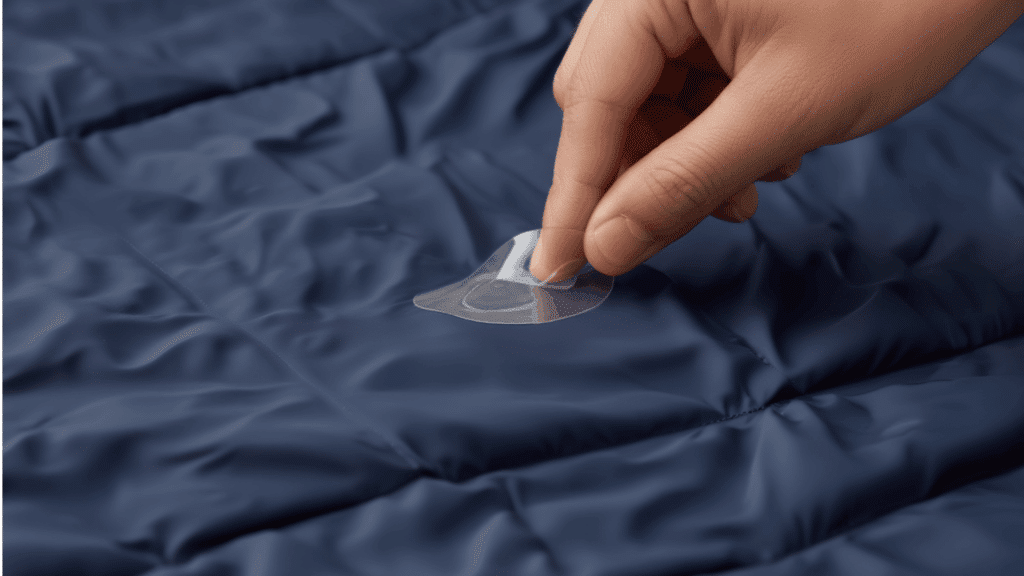
Once the area is clean and dry, apply the patch. If using a vinyl patch, cut it to size, leaving extra around the edges for a solid seal. Press it firmly over the hole to remove air bubbles.
For liquid sealants like Seam Grip or Aquaseal, apply a thin layer over the hole and let it dry slightly before patching.
Step 4: Let the Patch Cure Properly

After applying the patch, place a heavy object, such as books or towels, on top to help the adhesive set. This ensures a strong bond. Let the patch cure for 24 hours to allow the adhesive to form a secure, airtight seal.
Avoid using the mattress until the patch is fully cured to prevent air leakage and ensure durability.
How to Repair an Air Mattress Without a Patch Kit
If you don’t have a patch kit, you can still fix your air mattress with a few common household items. Start by locating the leak using soapy water, as described in the earlier steps.
Once you’ve found the hole, clean the area thoroughly with isopropyl alcohol. For the patch, you can use a piece of vinyl or plastic from an old shower curtain or plastic packaging.
Cut it slightly larger than the hole. Apply a thin layer of super glue or waterproof glue to the patch and press it firmly over the hole.
Use a heavy object, such as a book, to hold the patch in place while it dries. Allow the mattress to cure for 24 hours before reinflating.
Additional Tips for Specialized Surfaces
If your air mattress has a specialized surface, such as flocked or velveteen, the repair process requires extra care. Here are some helpful tips to ensure a secure patch.
- Flocked/Velveteen Surface: Gently sand or use acetone to remove the fuzzy coating so the adhesive can bond properly to the vinyl underneath.
- Small or Hard-to-Find Leaks: Inflate the mattress slightly and press your face close to feel for escaping air. This method helps detect even the tiniest holes.
- For Punctures Near Seams: Seams can be tricky to patch. Use a flexible sealant, such as Seam Grip, to ensure it bonds well to the material.
- Use Patch Kits for Clear Patches: If your mattress has a transparent surface, use clear patches to make the repair less noticeable. Many kits come with vinyl or adhesive patches designed for this purpose.
- Apply Extra Adhesive: For larger holes or tears, apply a thicker layer of adhesive before placing the patch. This ensures better coverage and a stronger seal.
- Use Heat for Better Bonding: Some adhesive patches, like those from Tenacious Tape, bond better when gently heated with a hairdryer. This can help improve the patch’s hold.
Specialized surfaces require a bit more effort to patch, but with the right approach, you can restore your mattress easily. Follow these tips for a stronger, longer-lasting fix.
Key Takeaways
Now that you know how to patch an air mattress, you can easily repair any leaks yourself and avoid the cost of replacing it. Whether you use a patch kit or household items like super glue, the process is simple and effective.
By following the steps, from locating the hole to applying the patch and letting it cure, you’ll know exactly how to fix a hole in an air mattress. Just be sure to allow enough curing time for a secure, lasting seal.
If you’re facing larger holes or seam issues, professional help may be needed. Have questions or want to share your experience? Feel free to leave a comment or explore more helpful guides!